Materials
Here you can find all materials in the storage (warehouse). The material defines a physical resource, used in production. Materials are also used to better describe product blueprints with its additional properties like material types and formats.
How to see Material Type photo in Materials Table?
How to add or edit standard price to Material?
How to add or edit price to Material?
How to add or edit Warehouse location?
How to add or edit Expire date?
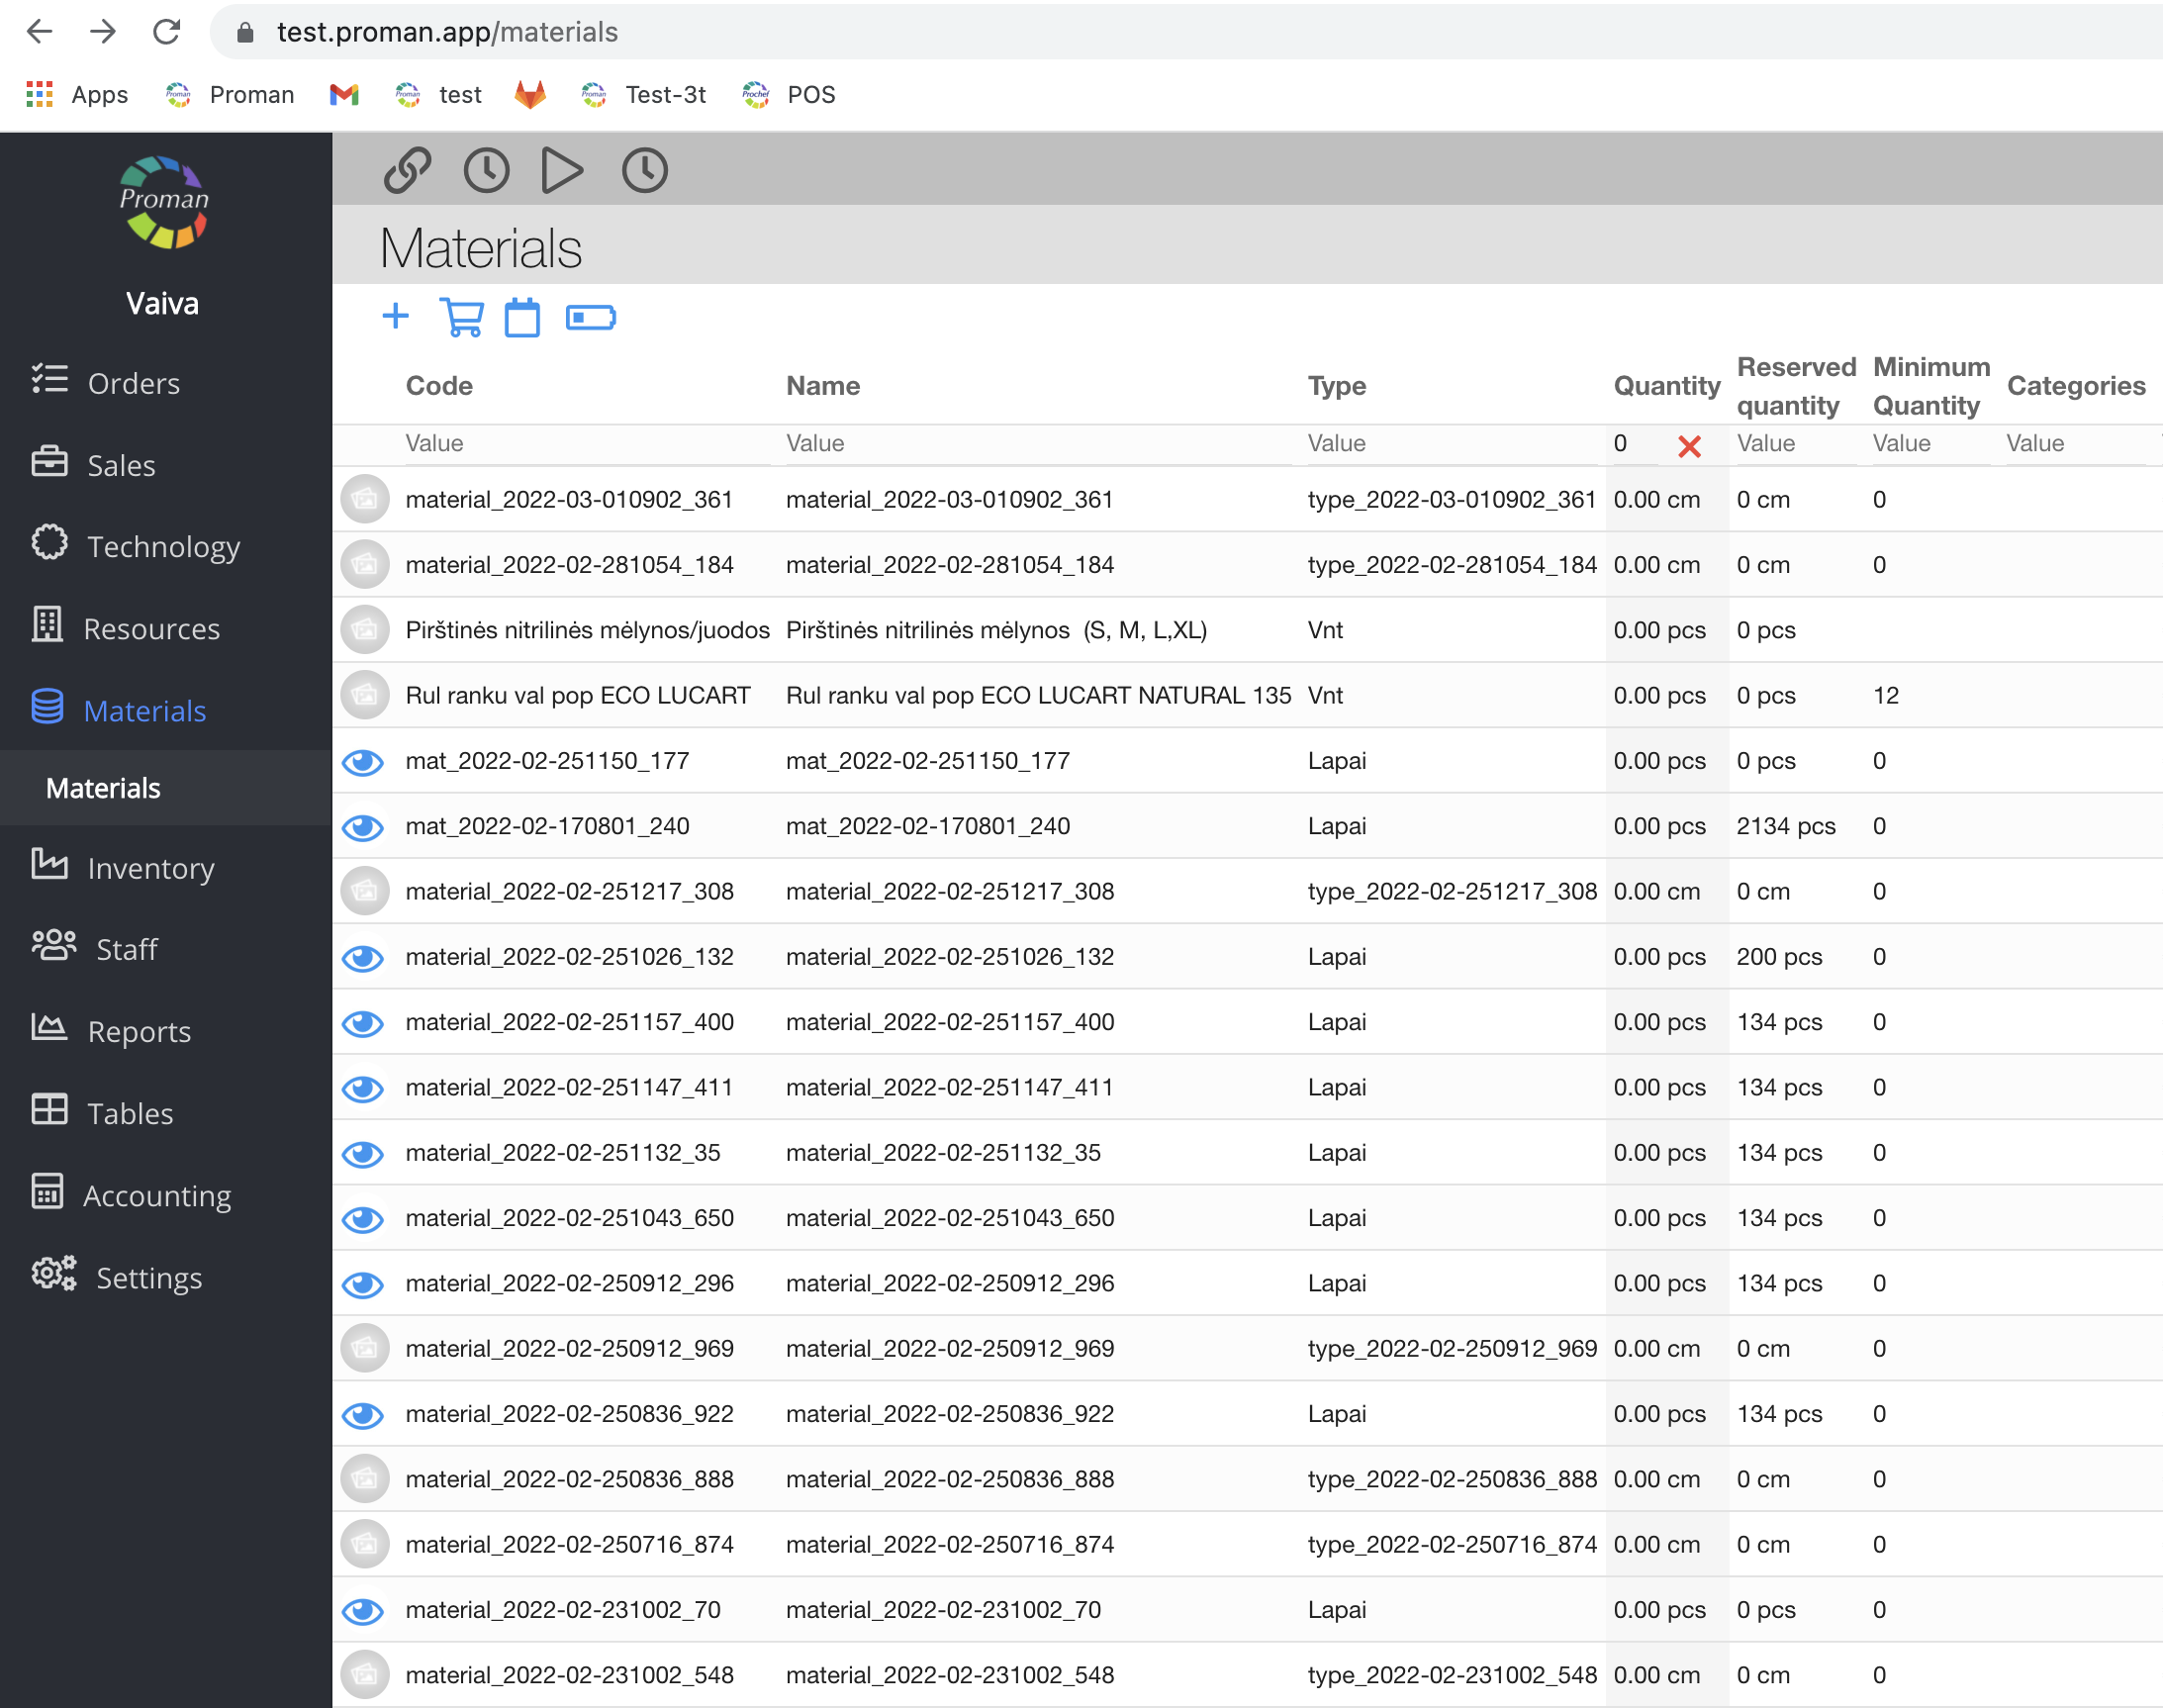
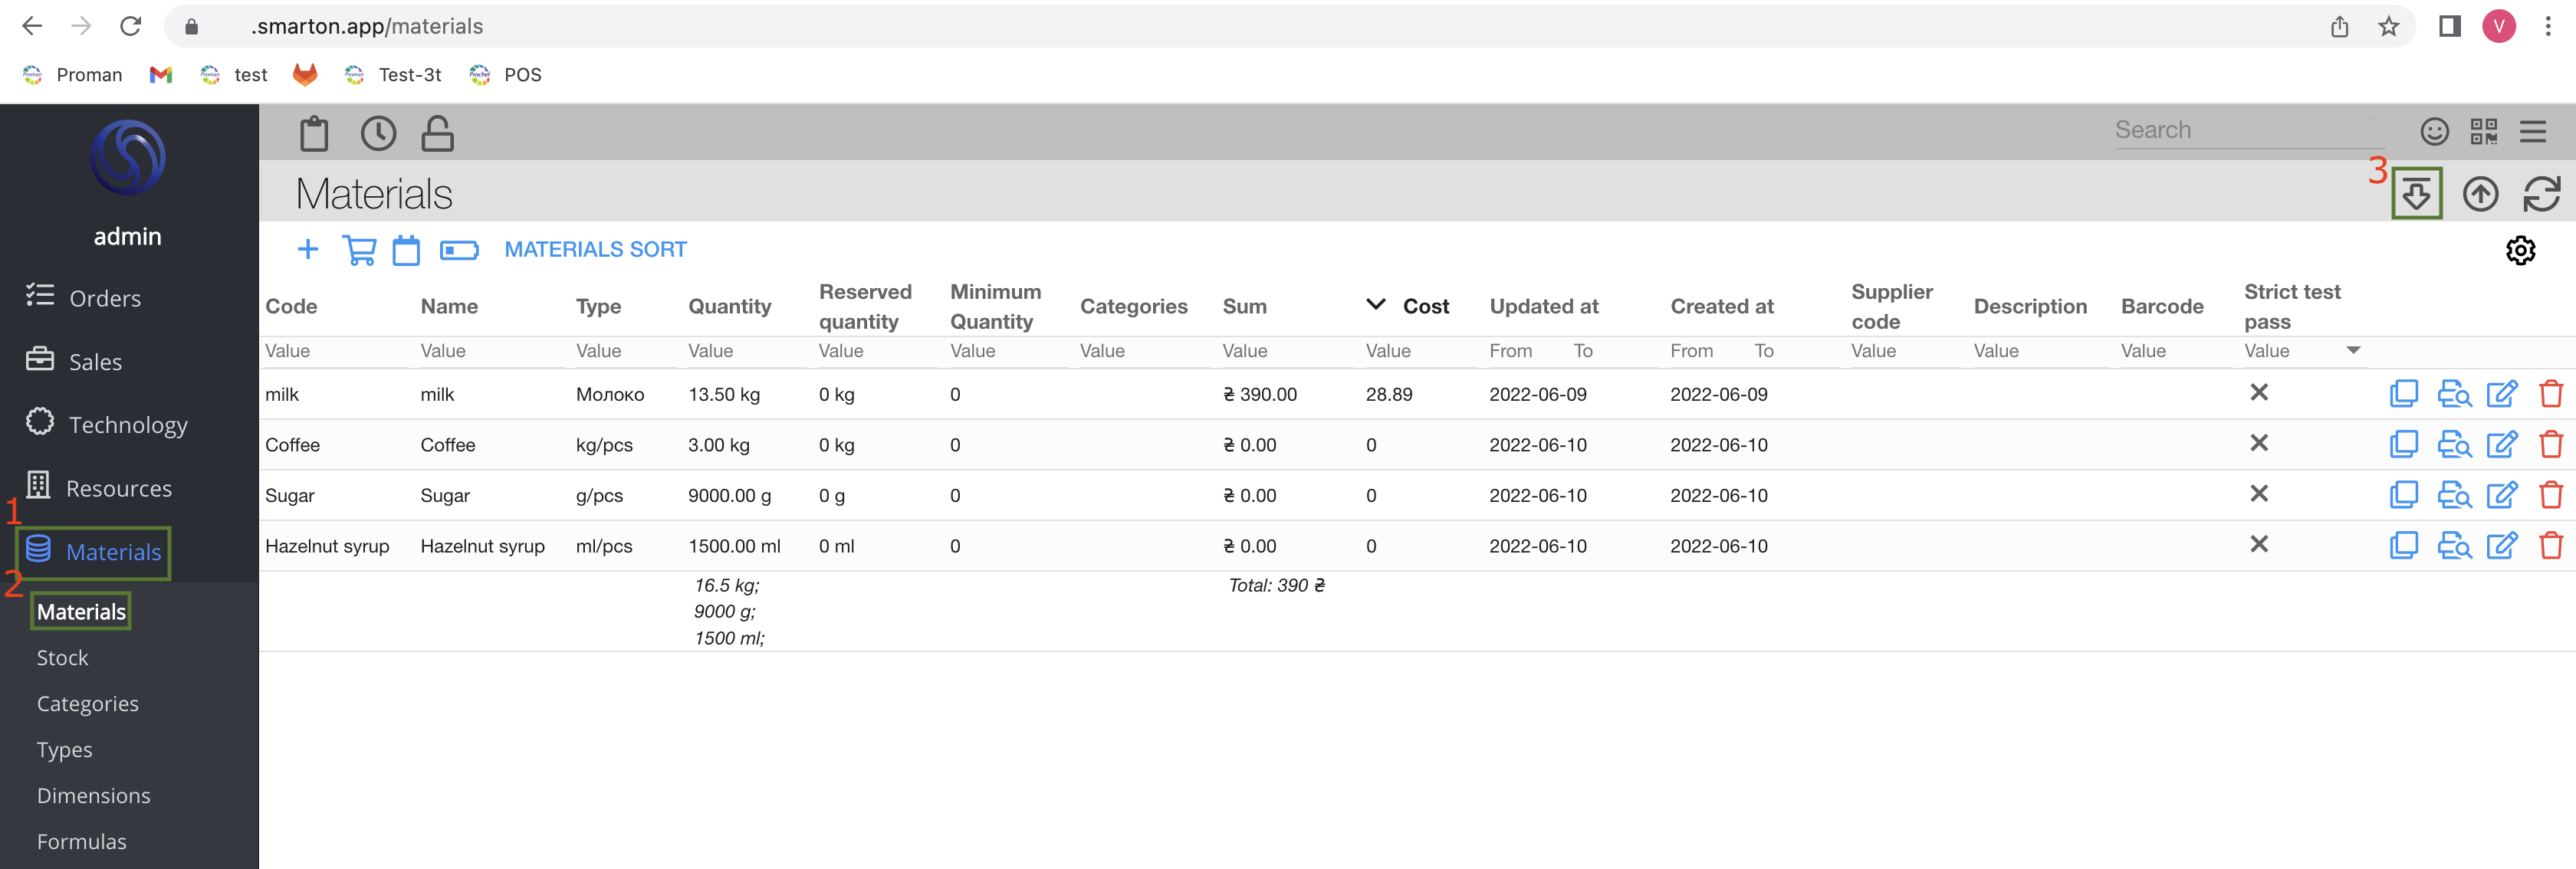
How to find "materials"? |
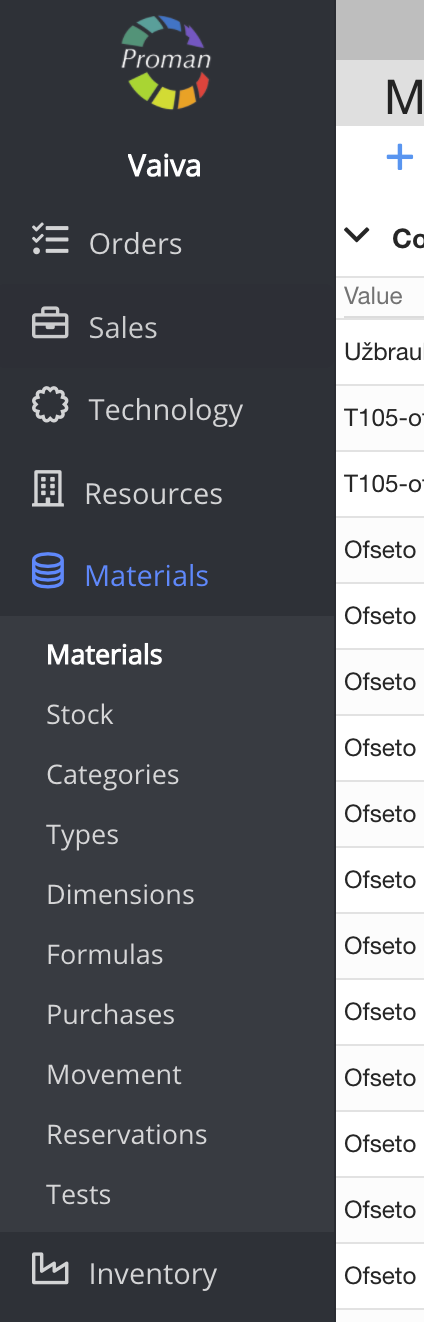
To find "materials":
1. Go to 
2. Then- 
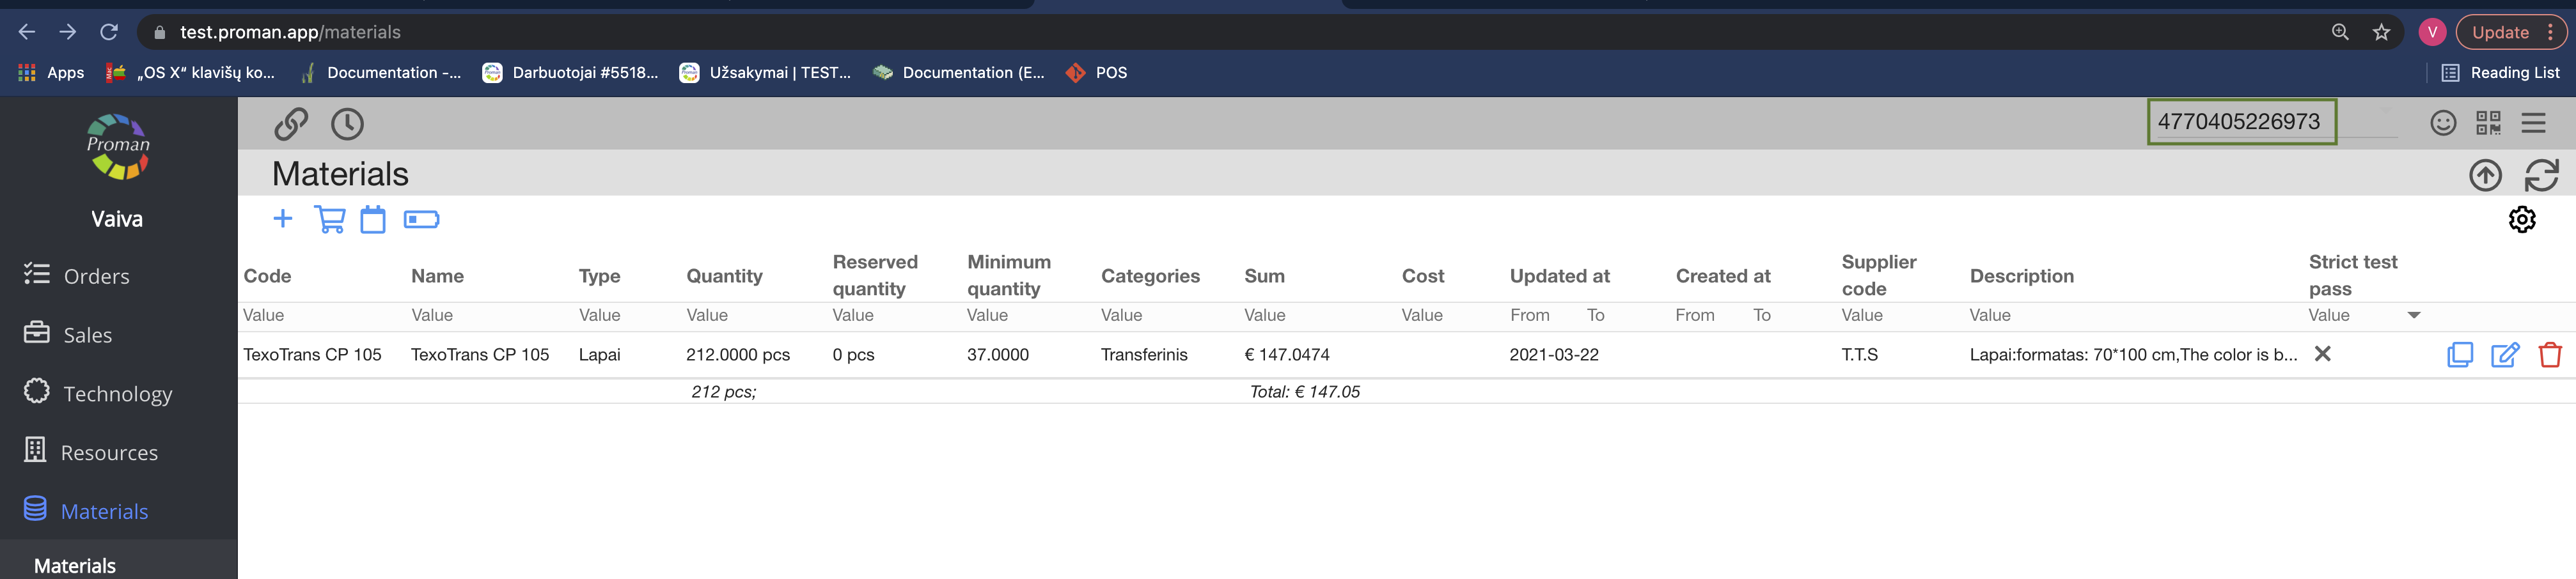
Now you can see the "material list":

Here you can see, create (


| Button | What does it indicate? |
 | You can create a new material |
 | You can purchase a material. For more information about purchases see here |
 | You can see events of the material in store |
 | You can see materials that you need to purchase |
You can also look for material barcodes in the table of materials:
How to create a new material? |
To create a new material, you need to create a material type first. For more information on how to create a new material type, visit here.
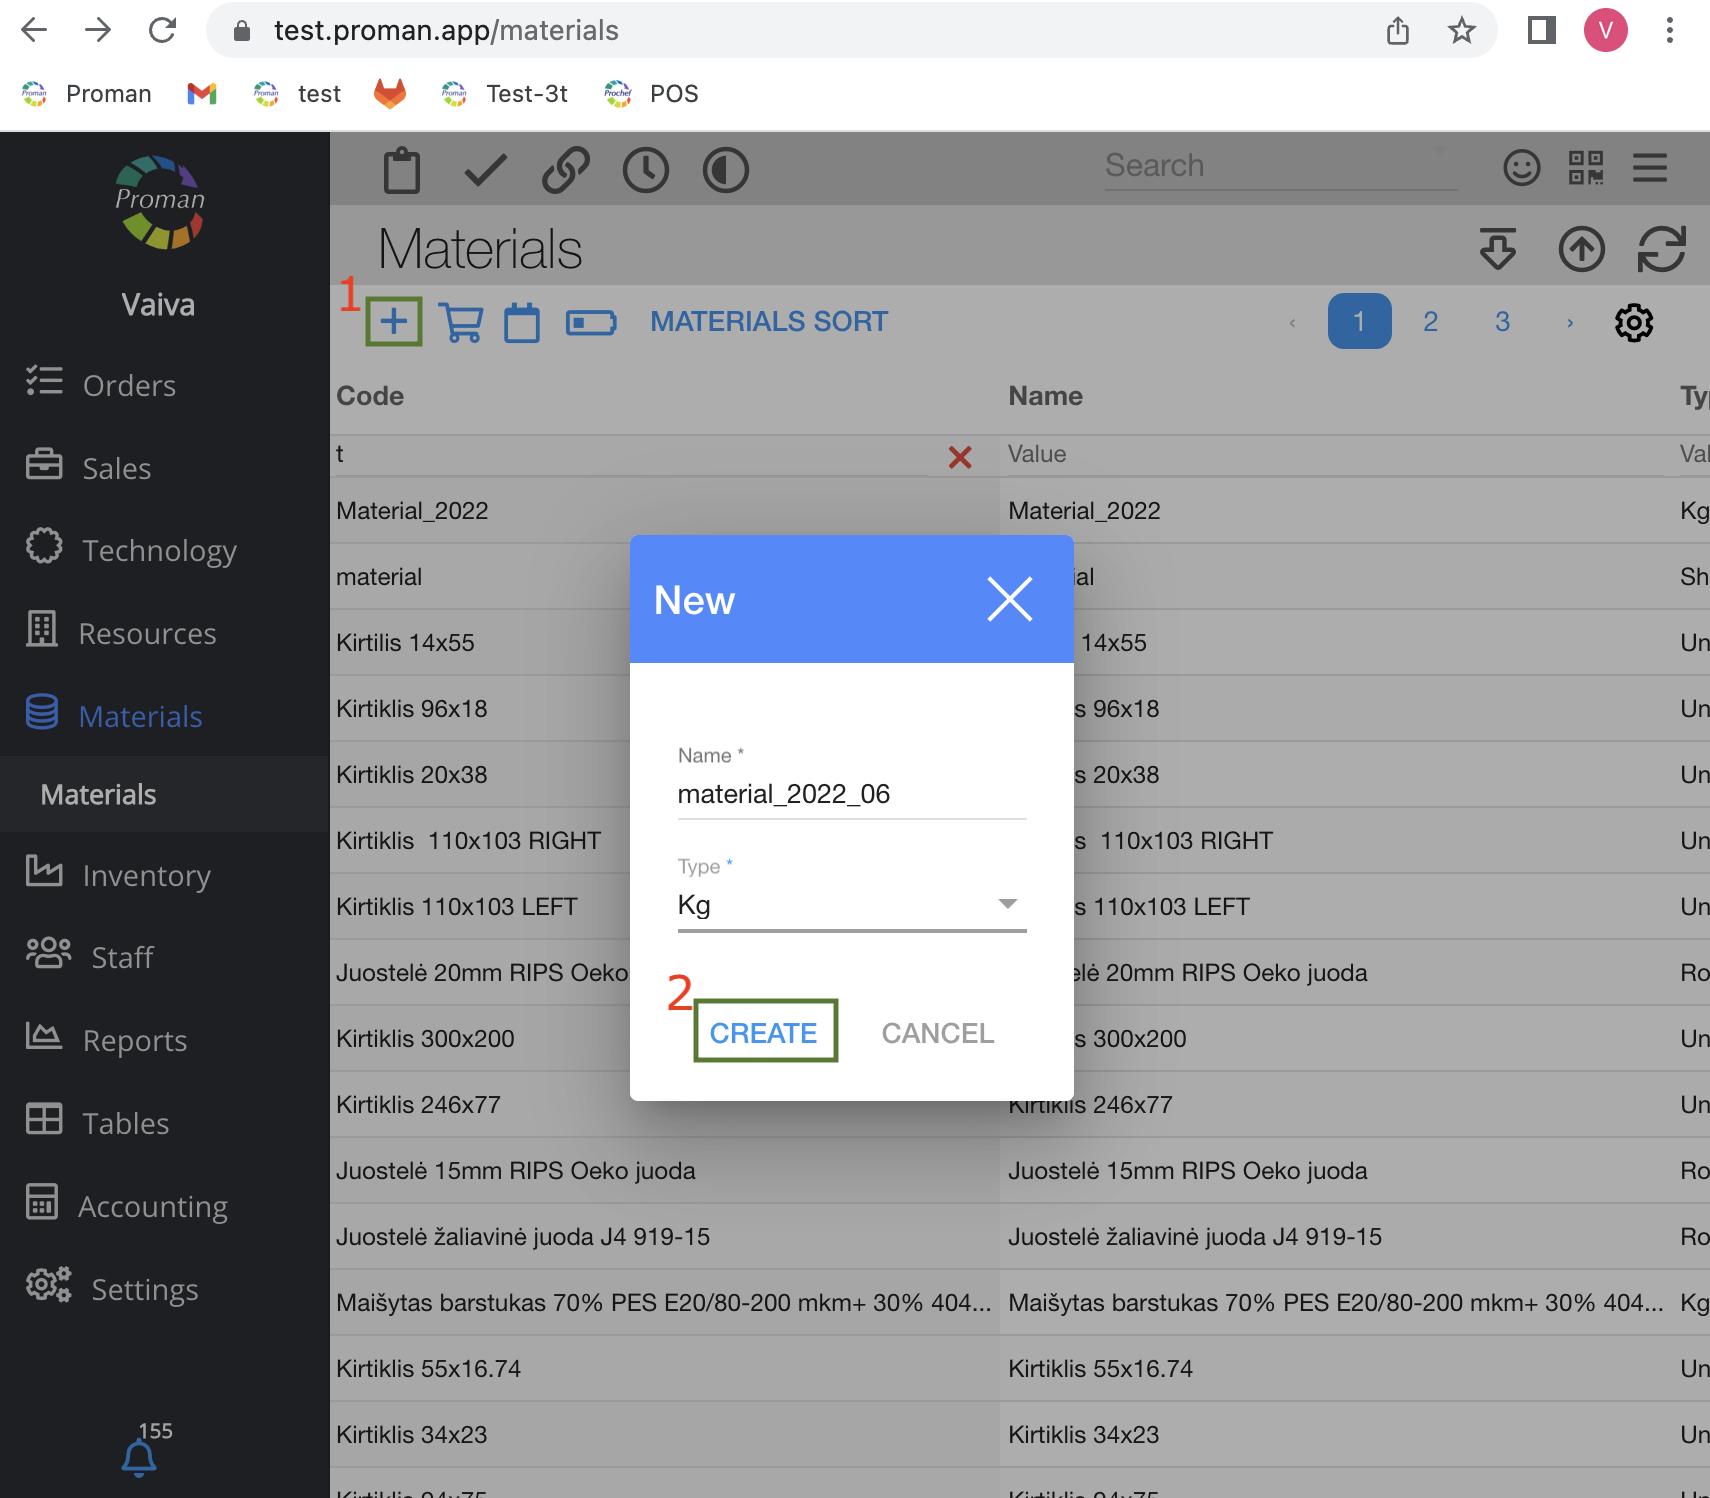
1. Click on
2. Enter a material name, choose a type and click

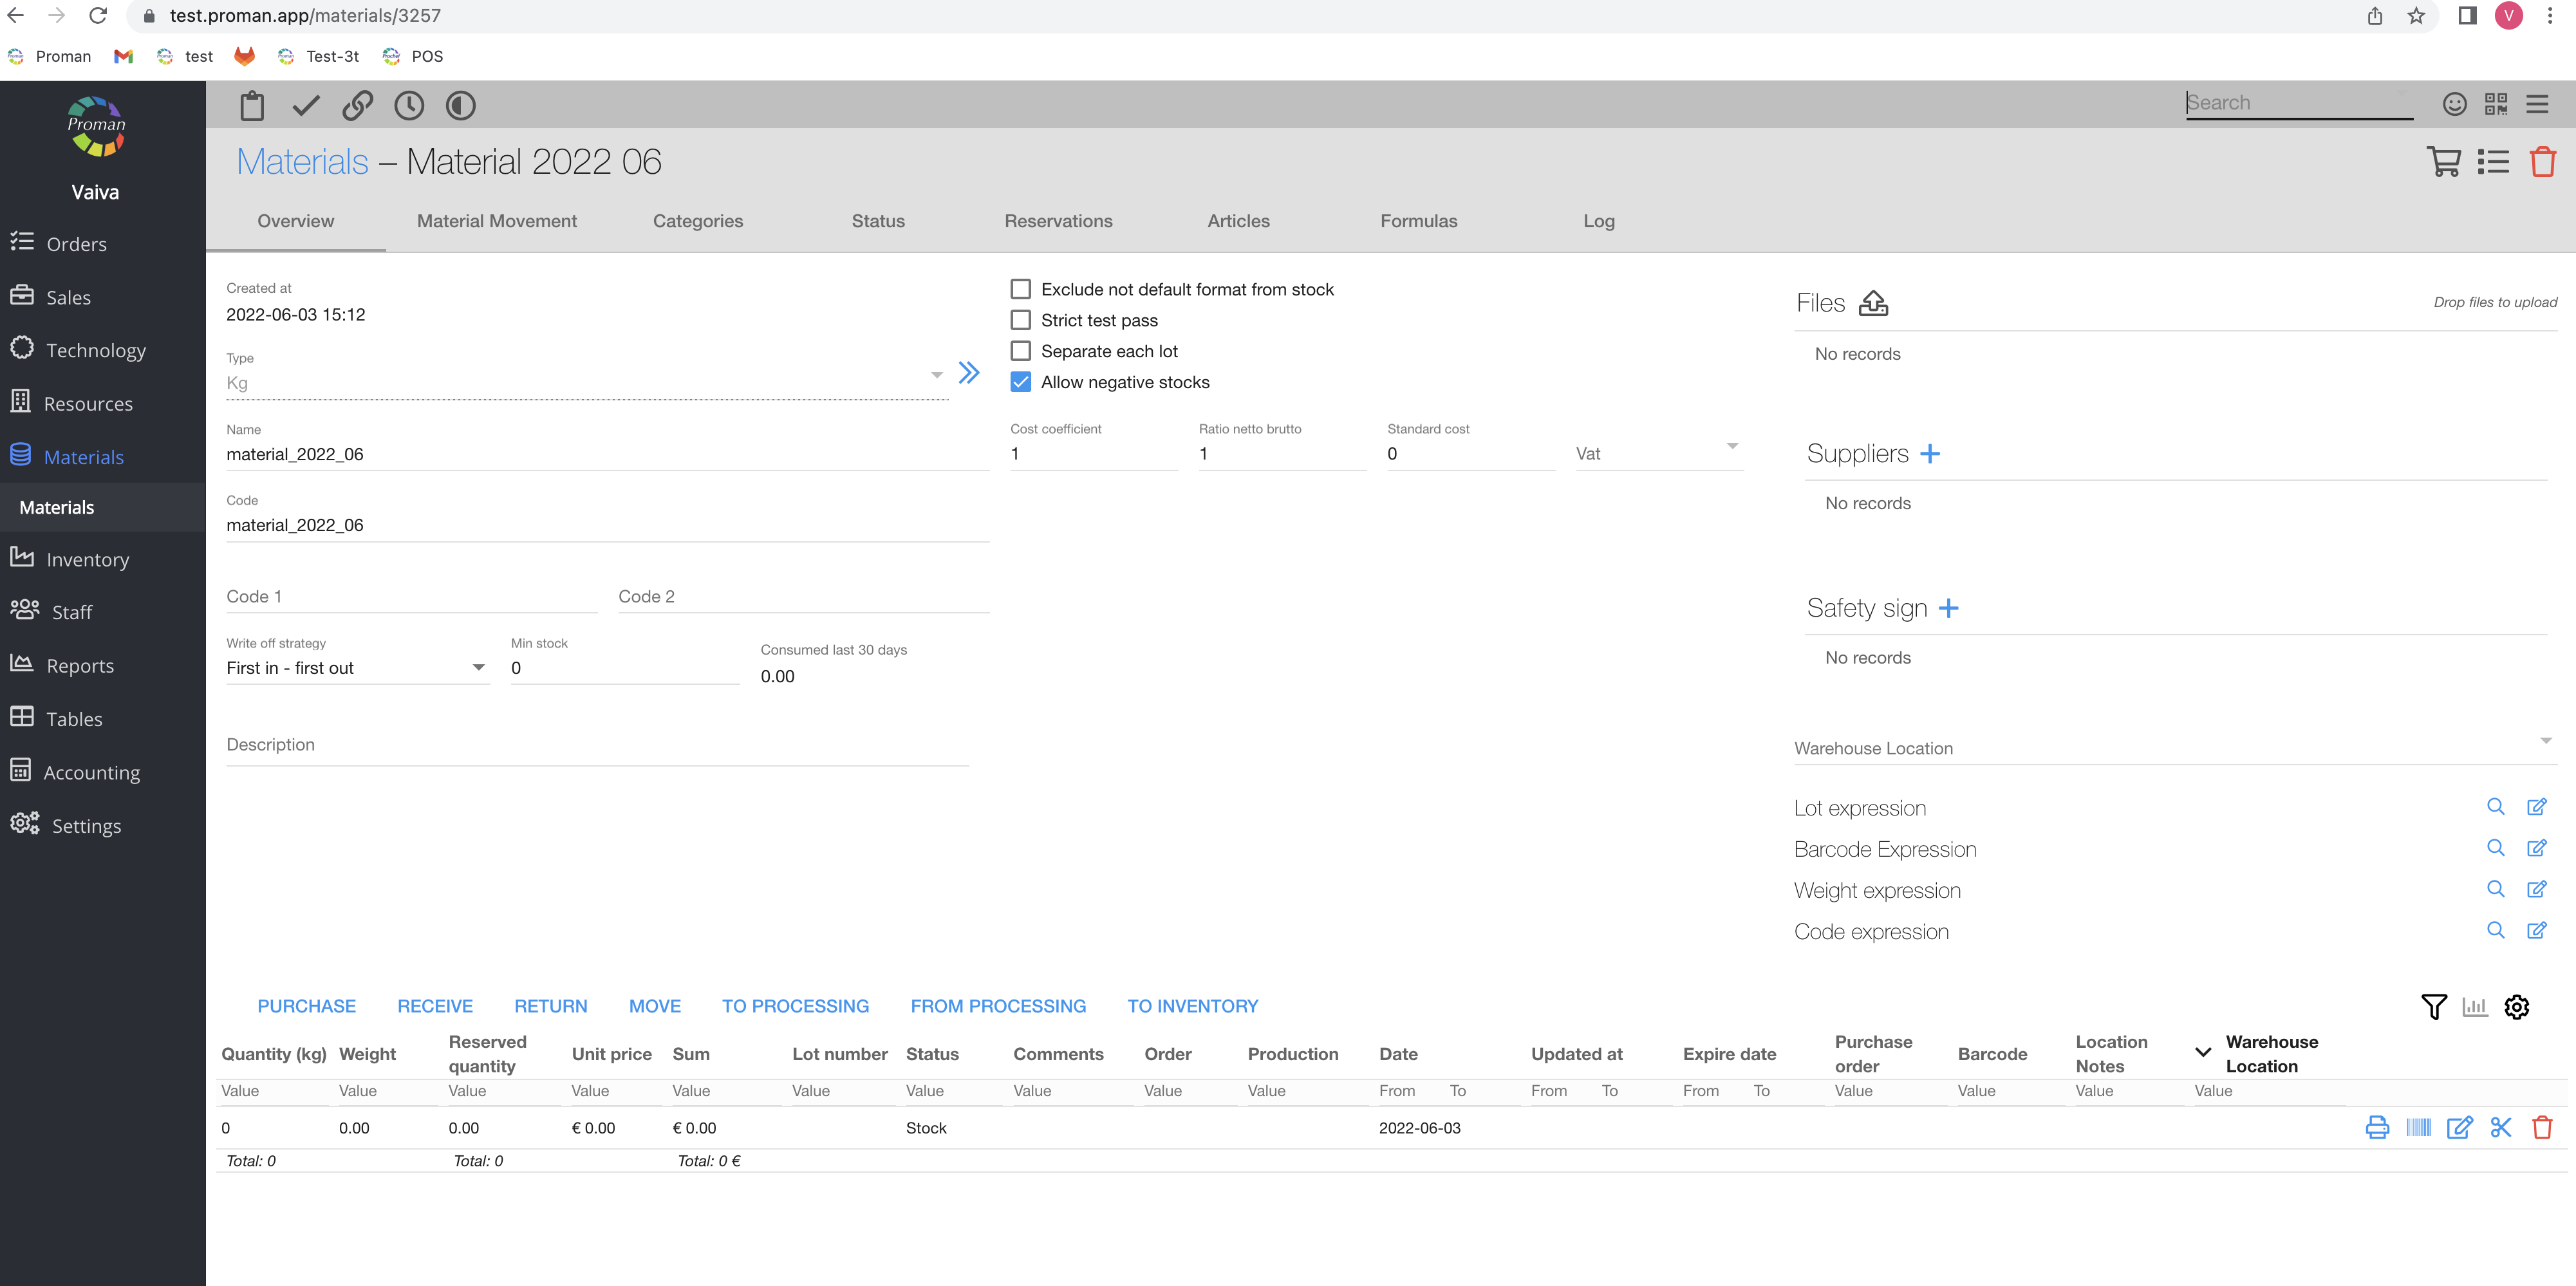
Now you can see the material options.
Note: When you are missing information, check if you have "Extended information" turned on.
For more information about extended information, please visit here.
Materials manage |
1. If "Separate each lot" is activated
- we take all the lots in that format
- from them we deduct the order quantity according to FIFO / FILO
2. If "Separate each lot" is off
- we only take the default quant
- regardless of FIFO / FILO, we only remove from the specified or default quanto
3. If "Allow negative stock" is off
- we are trying to write it down according to the "Separate each lot" strategy
- If there is not enough quantity, we will announce that it is out of stock, we will remove nothing
4. If "Allow negative stock" is enabled
- write off according to the "Separate each lot" strategy
- if there is not enough quantity, we report, we remove the whole quantity, we save the difference with a minus sign
5. We get the price:
- we take the material's standard cost and multiply by the amount of production material
- if the material's "Standard cost" is empty, we take from the default Quant "Unit cost"
| Button | What does it indicate? |
 | You can choose material's write off strategy - "First produce - first write off", "First produce - last write off", "First expire - first out" |
 | You can only count the main material ( ) or all of them ( ) or all of them ( ) ) |
 | You can send to production only those materials that passed quality tests () unless it isn't important () |
 | You can count the new purchase to main materials () or create a new one ()(you can also test them) |
 | You can allow the use of negative stocks in production, that is set in an article (if you use it manually, you can use negative material in stock) |
 | You can enter an expression. For more information about the expressions, visit here |
 | You can create material purchases |
 | You can enter/receive material |
 | You can return the material |
 | You can move the material to other places (for example from stock to write off or from reserve to production) |
 | You can send materials to processing |
 | You can receive materials from processing |
 | You can move materials to inventory |

| Button | What does it indicate? |
 | You can print a barcode |
 | You can enter a barcode |
 | You can add testing information (you can see it only if the button "Separate each lot" is switched on) |
| You can edit material information, add and edit price, quantity, warehouse location, supplier, expiration date and etc. |
 | You can split the material to other warehouse locations |
| You can delete material |
| How to add or edit standard price of materials? |
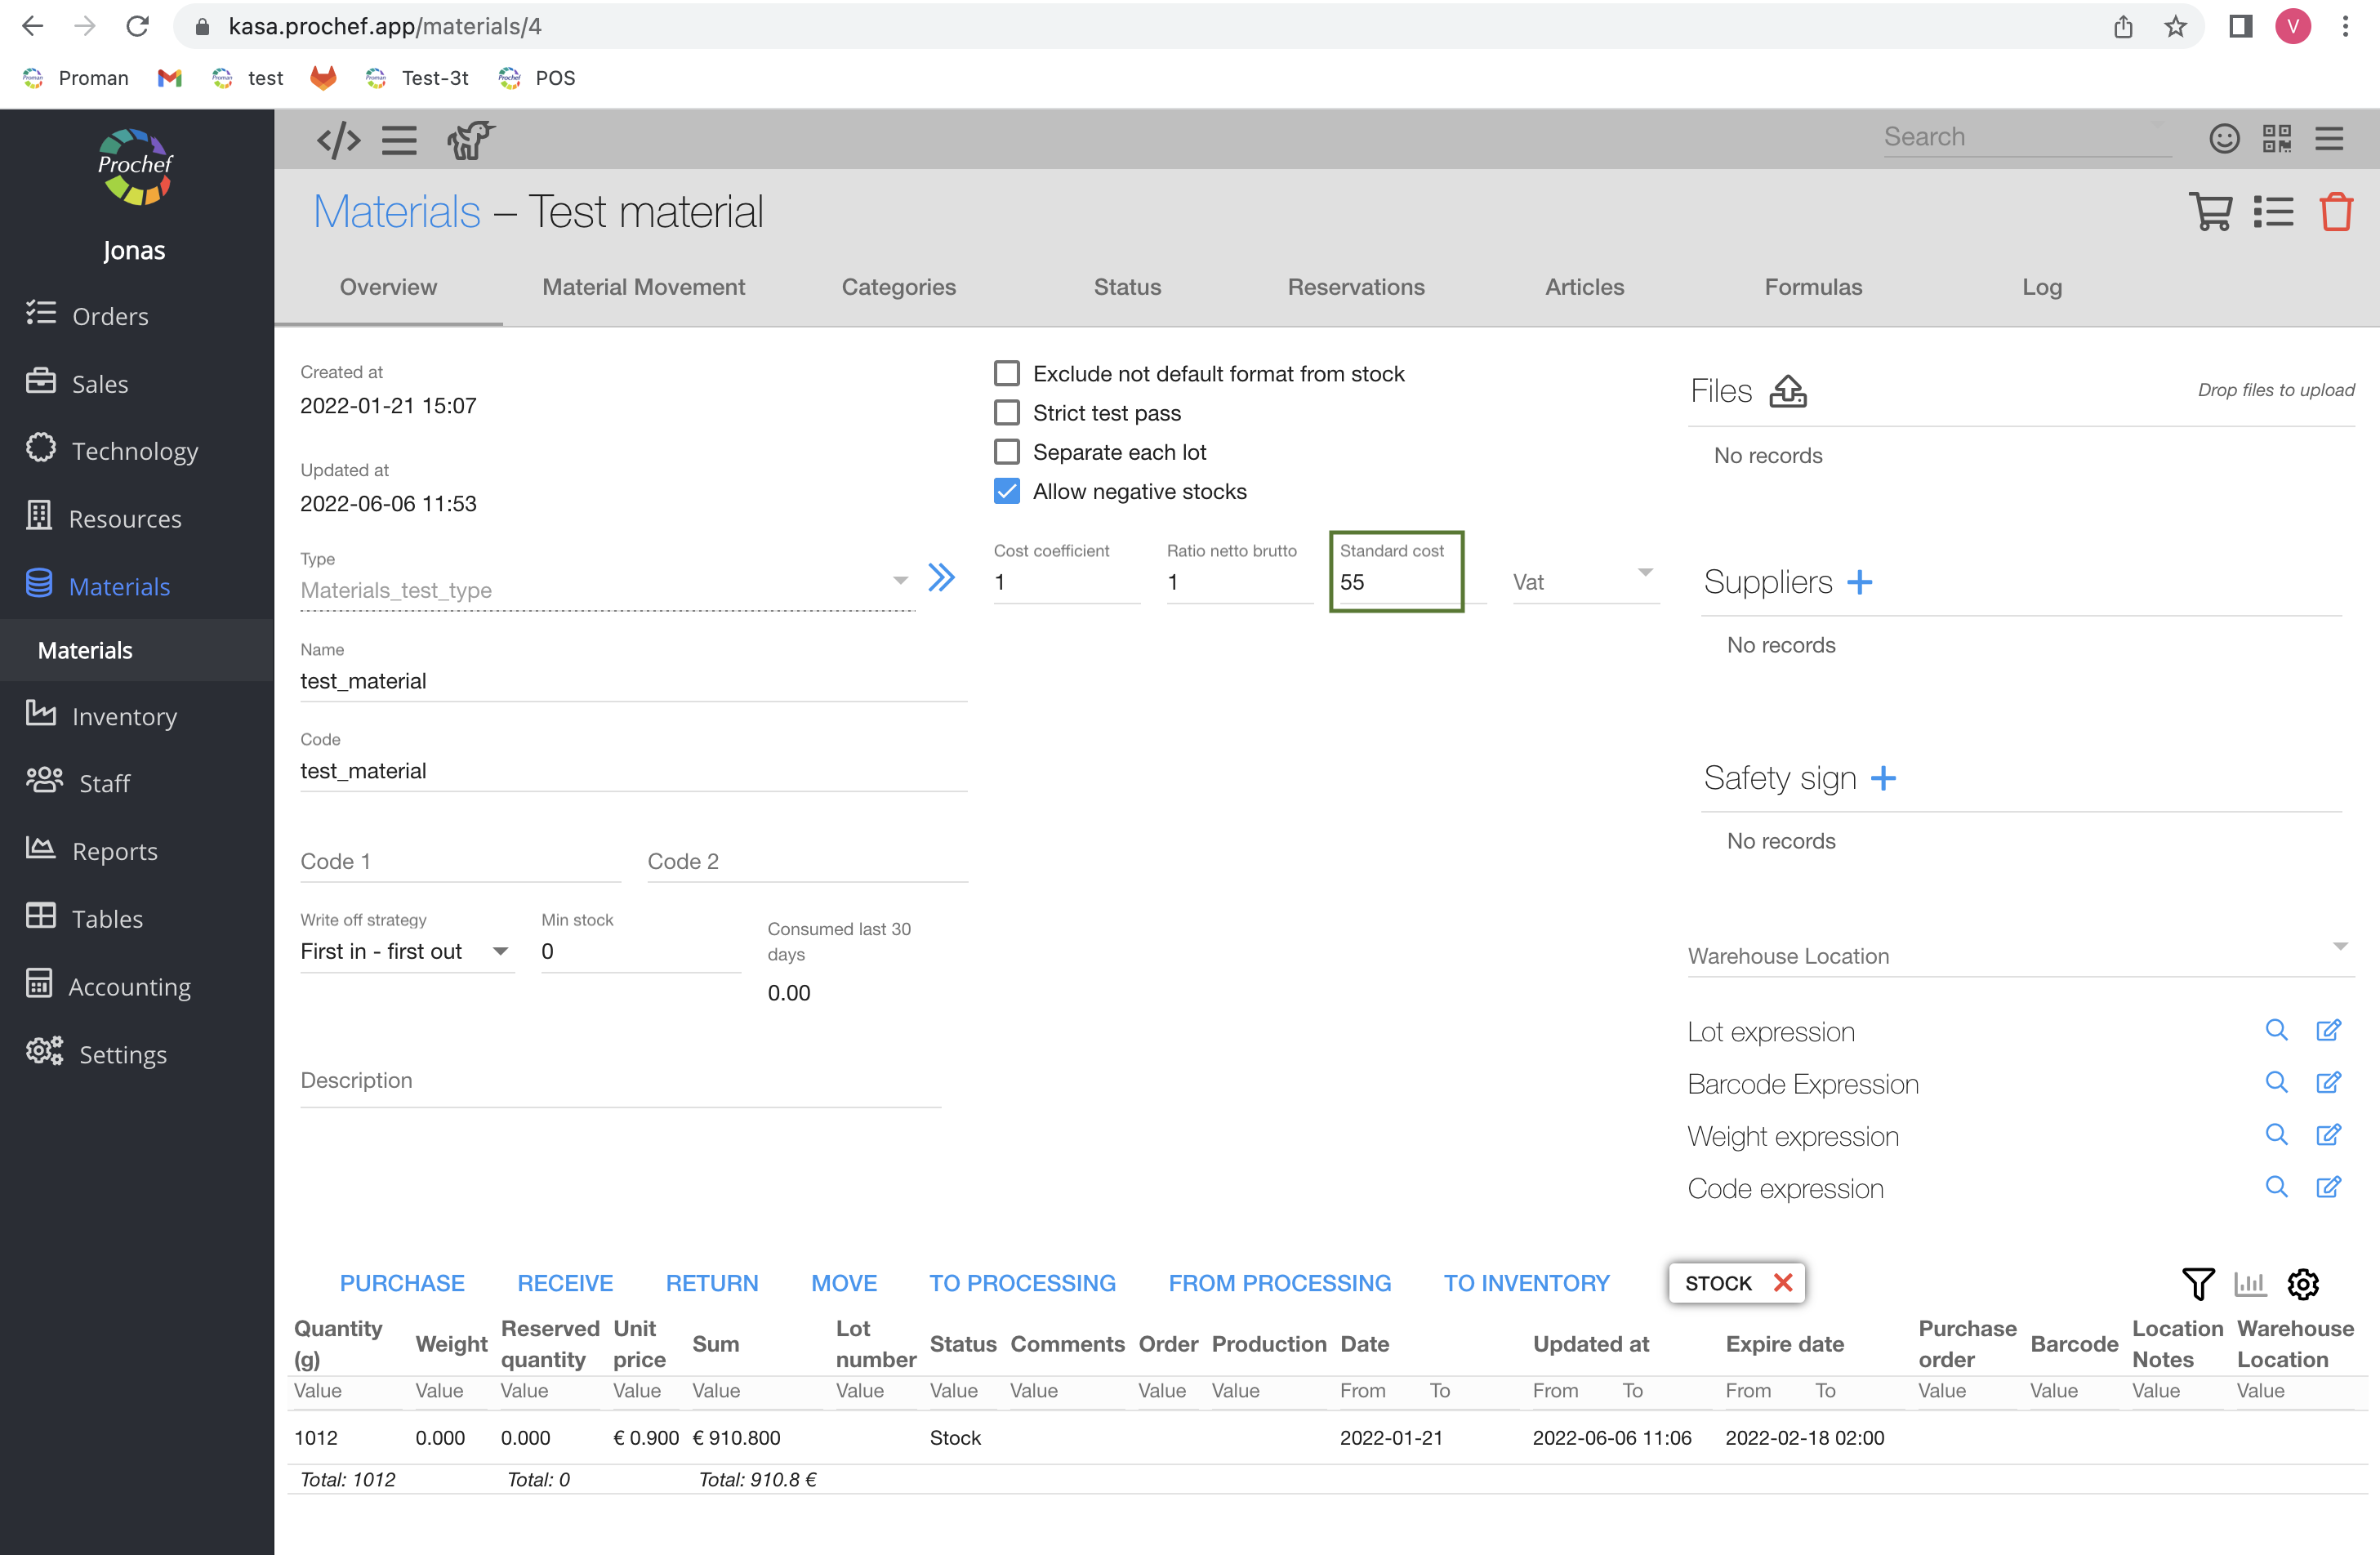
Click on 
| How to create a new material purchase? |
To create a new material purchase:
1. Click on
2. In the dialog table enter needed information
3. Click
Now you can see the material in the list (the last one)

For more information about purchases see here
| Material movement |

Here you can see and edit (
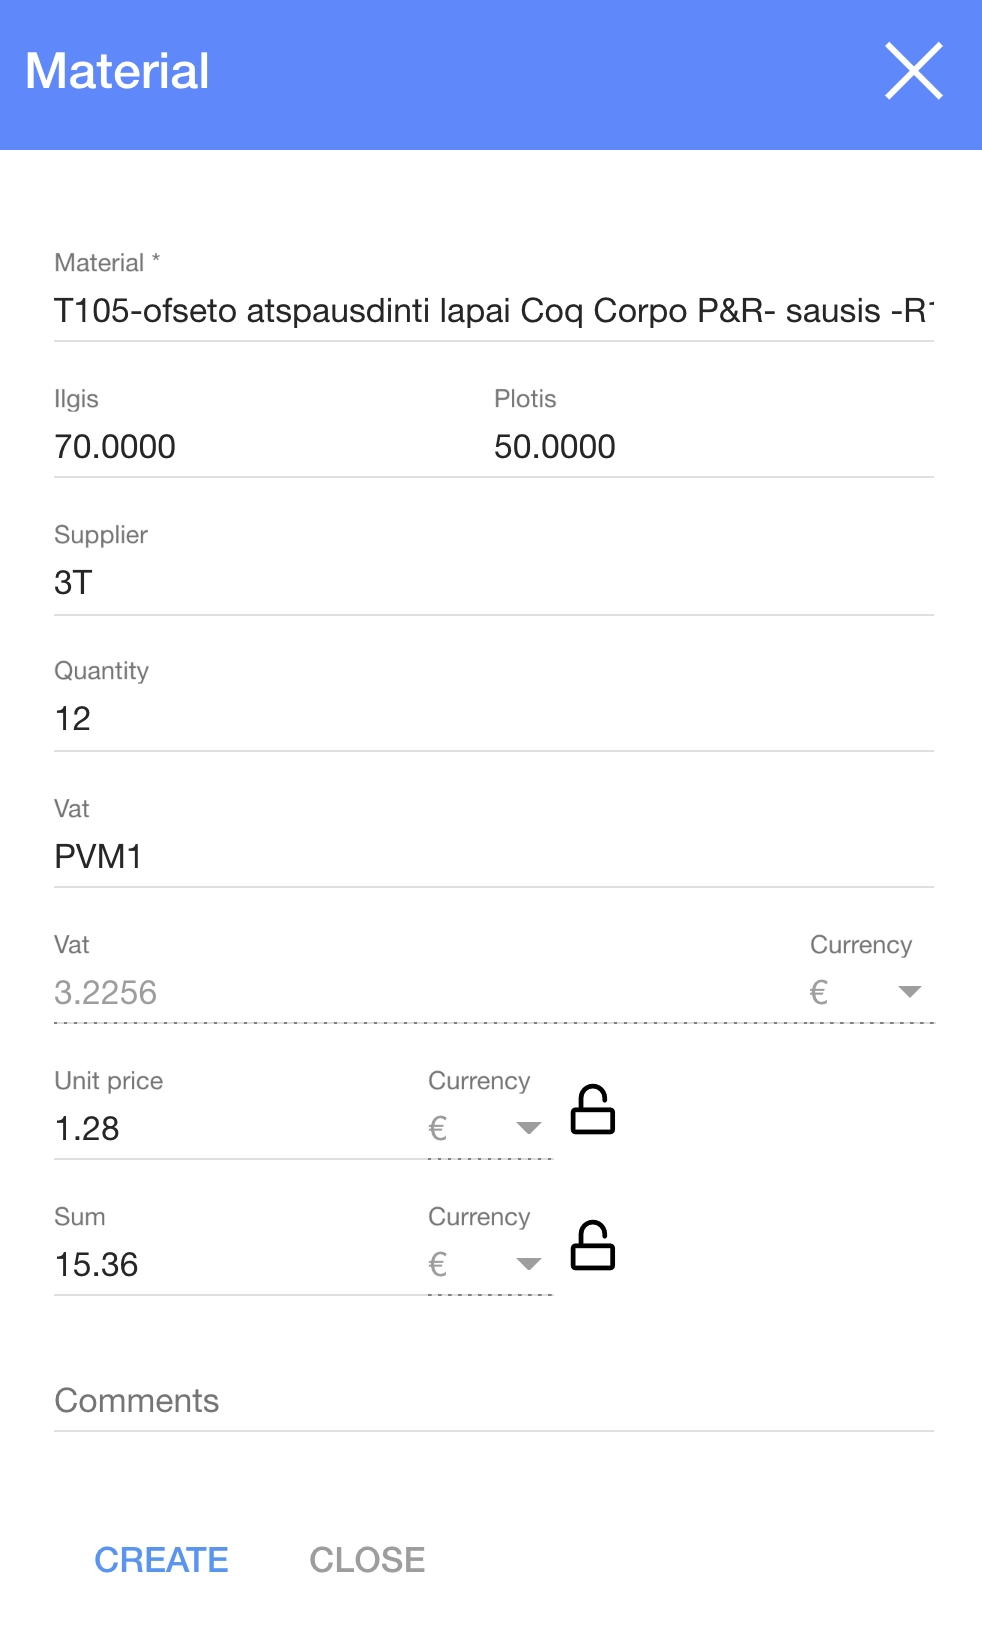
| Material Categories |
Here you can see and add (click 
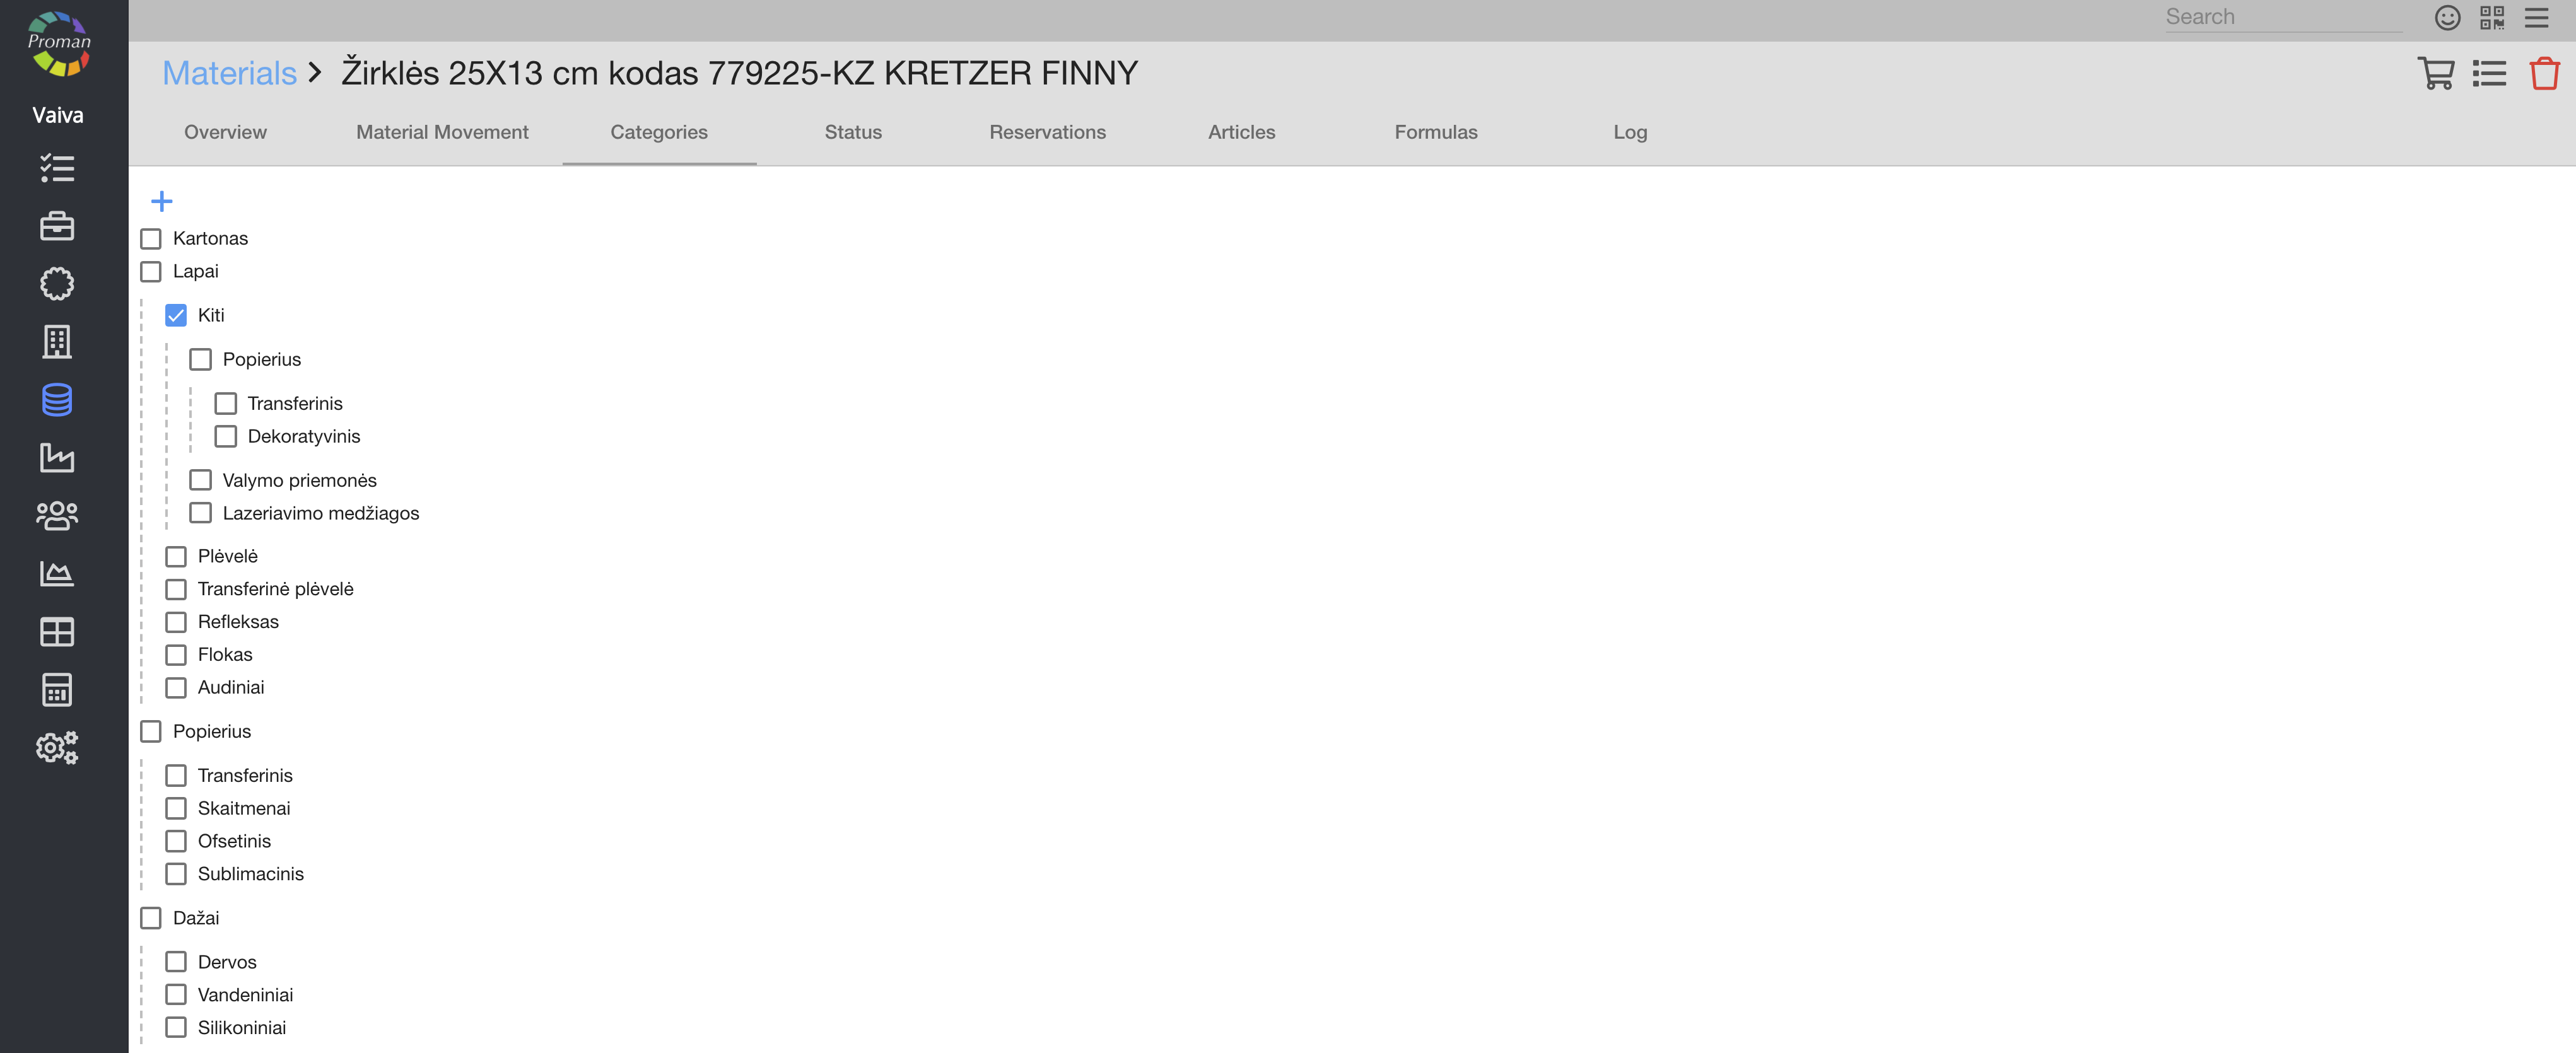
| Material Status |
Here you can see the materials status
| Material Reservations |

Here you can see, create (
| Material Articles |

Here you can see articles, that use the material
| Material Formulas |

Here you can see formulas, that involve the material. For more information visit here
| Material Log |
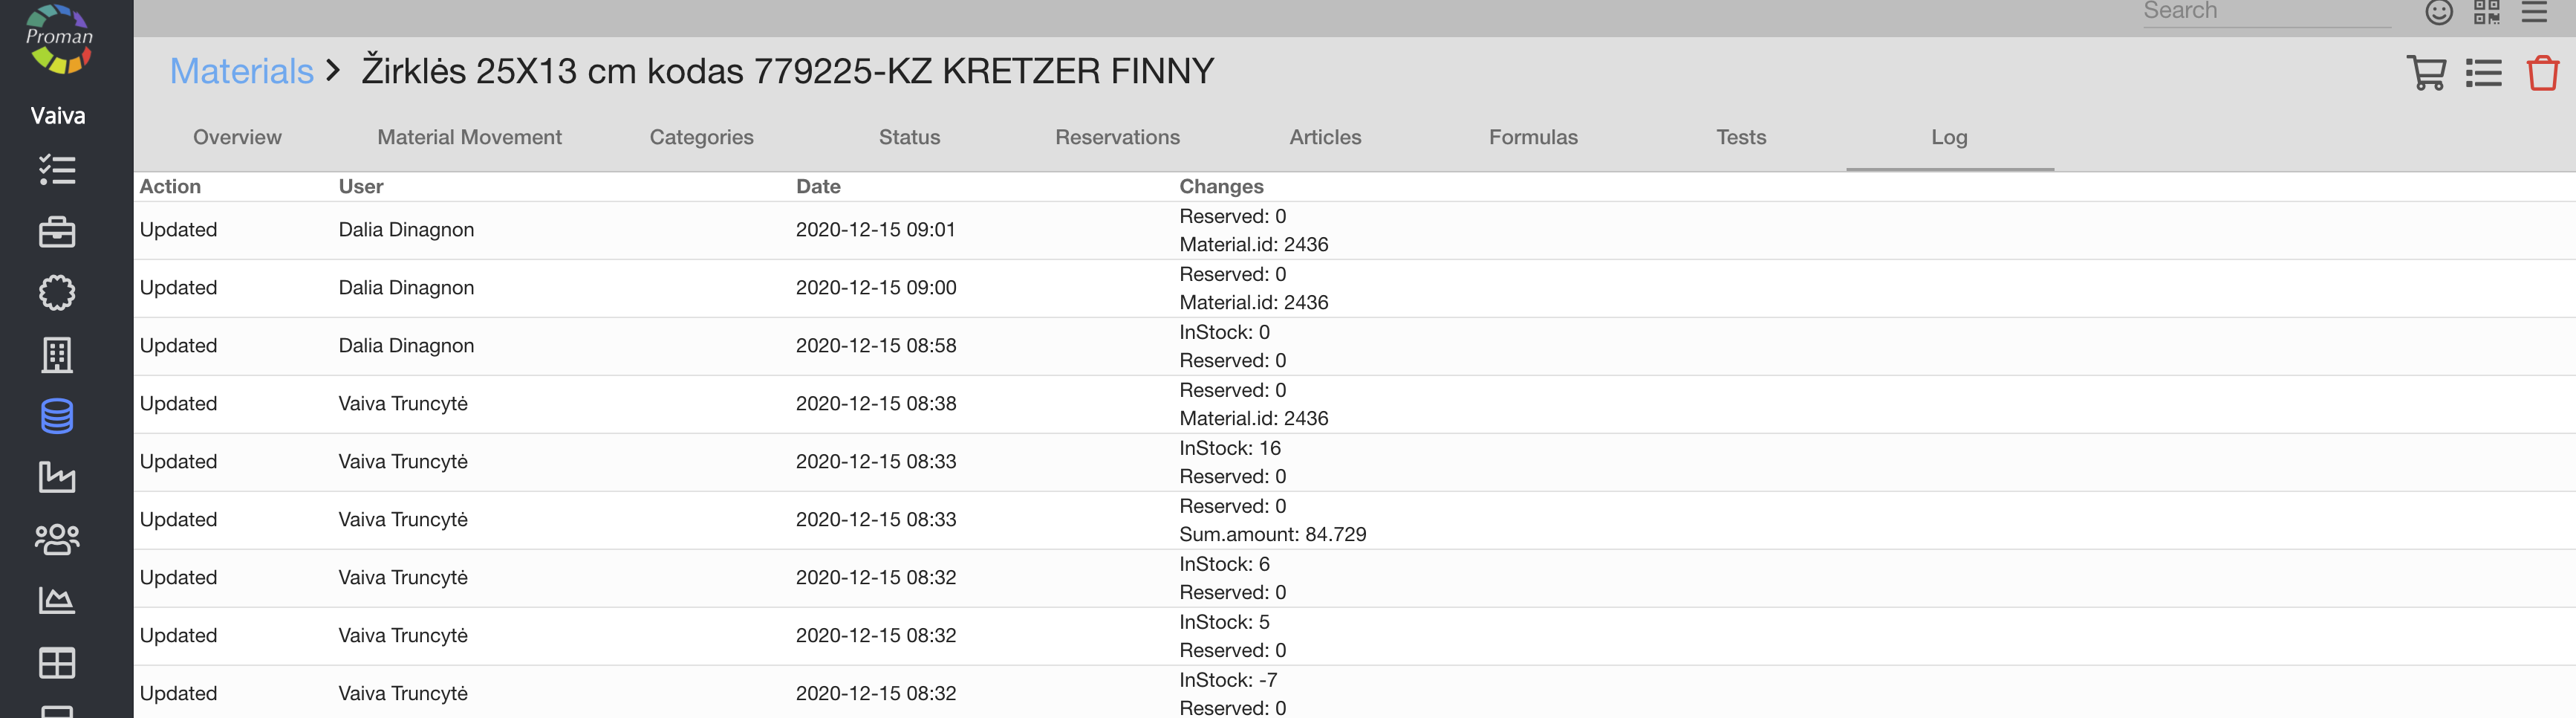
Here you can see all updates
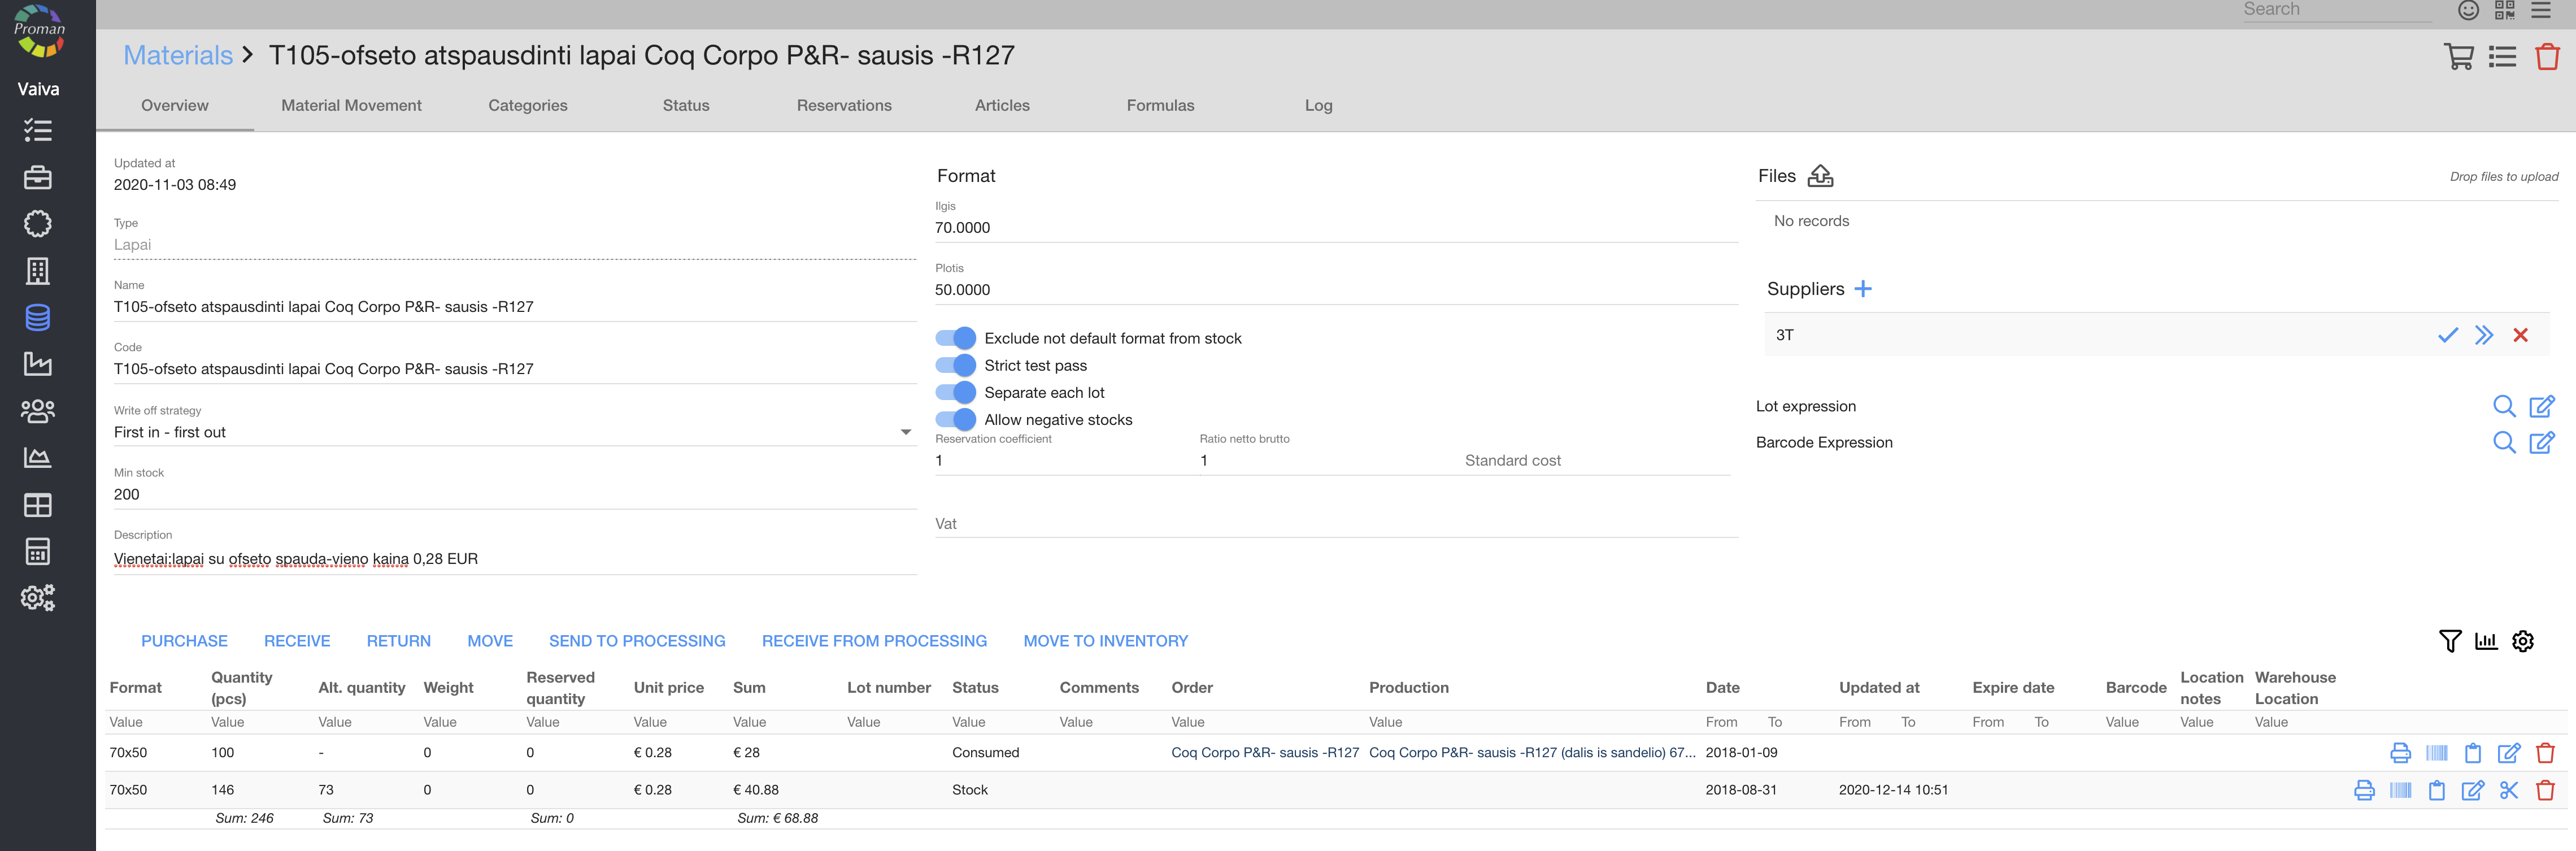
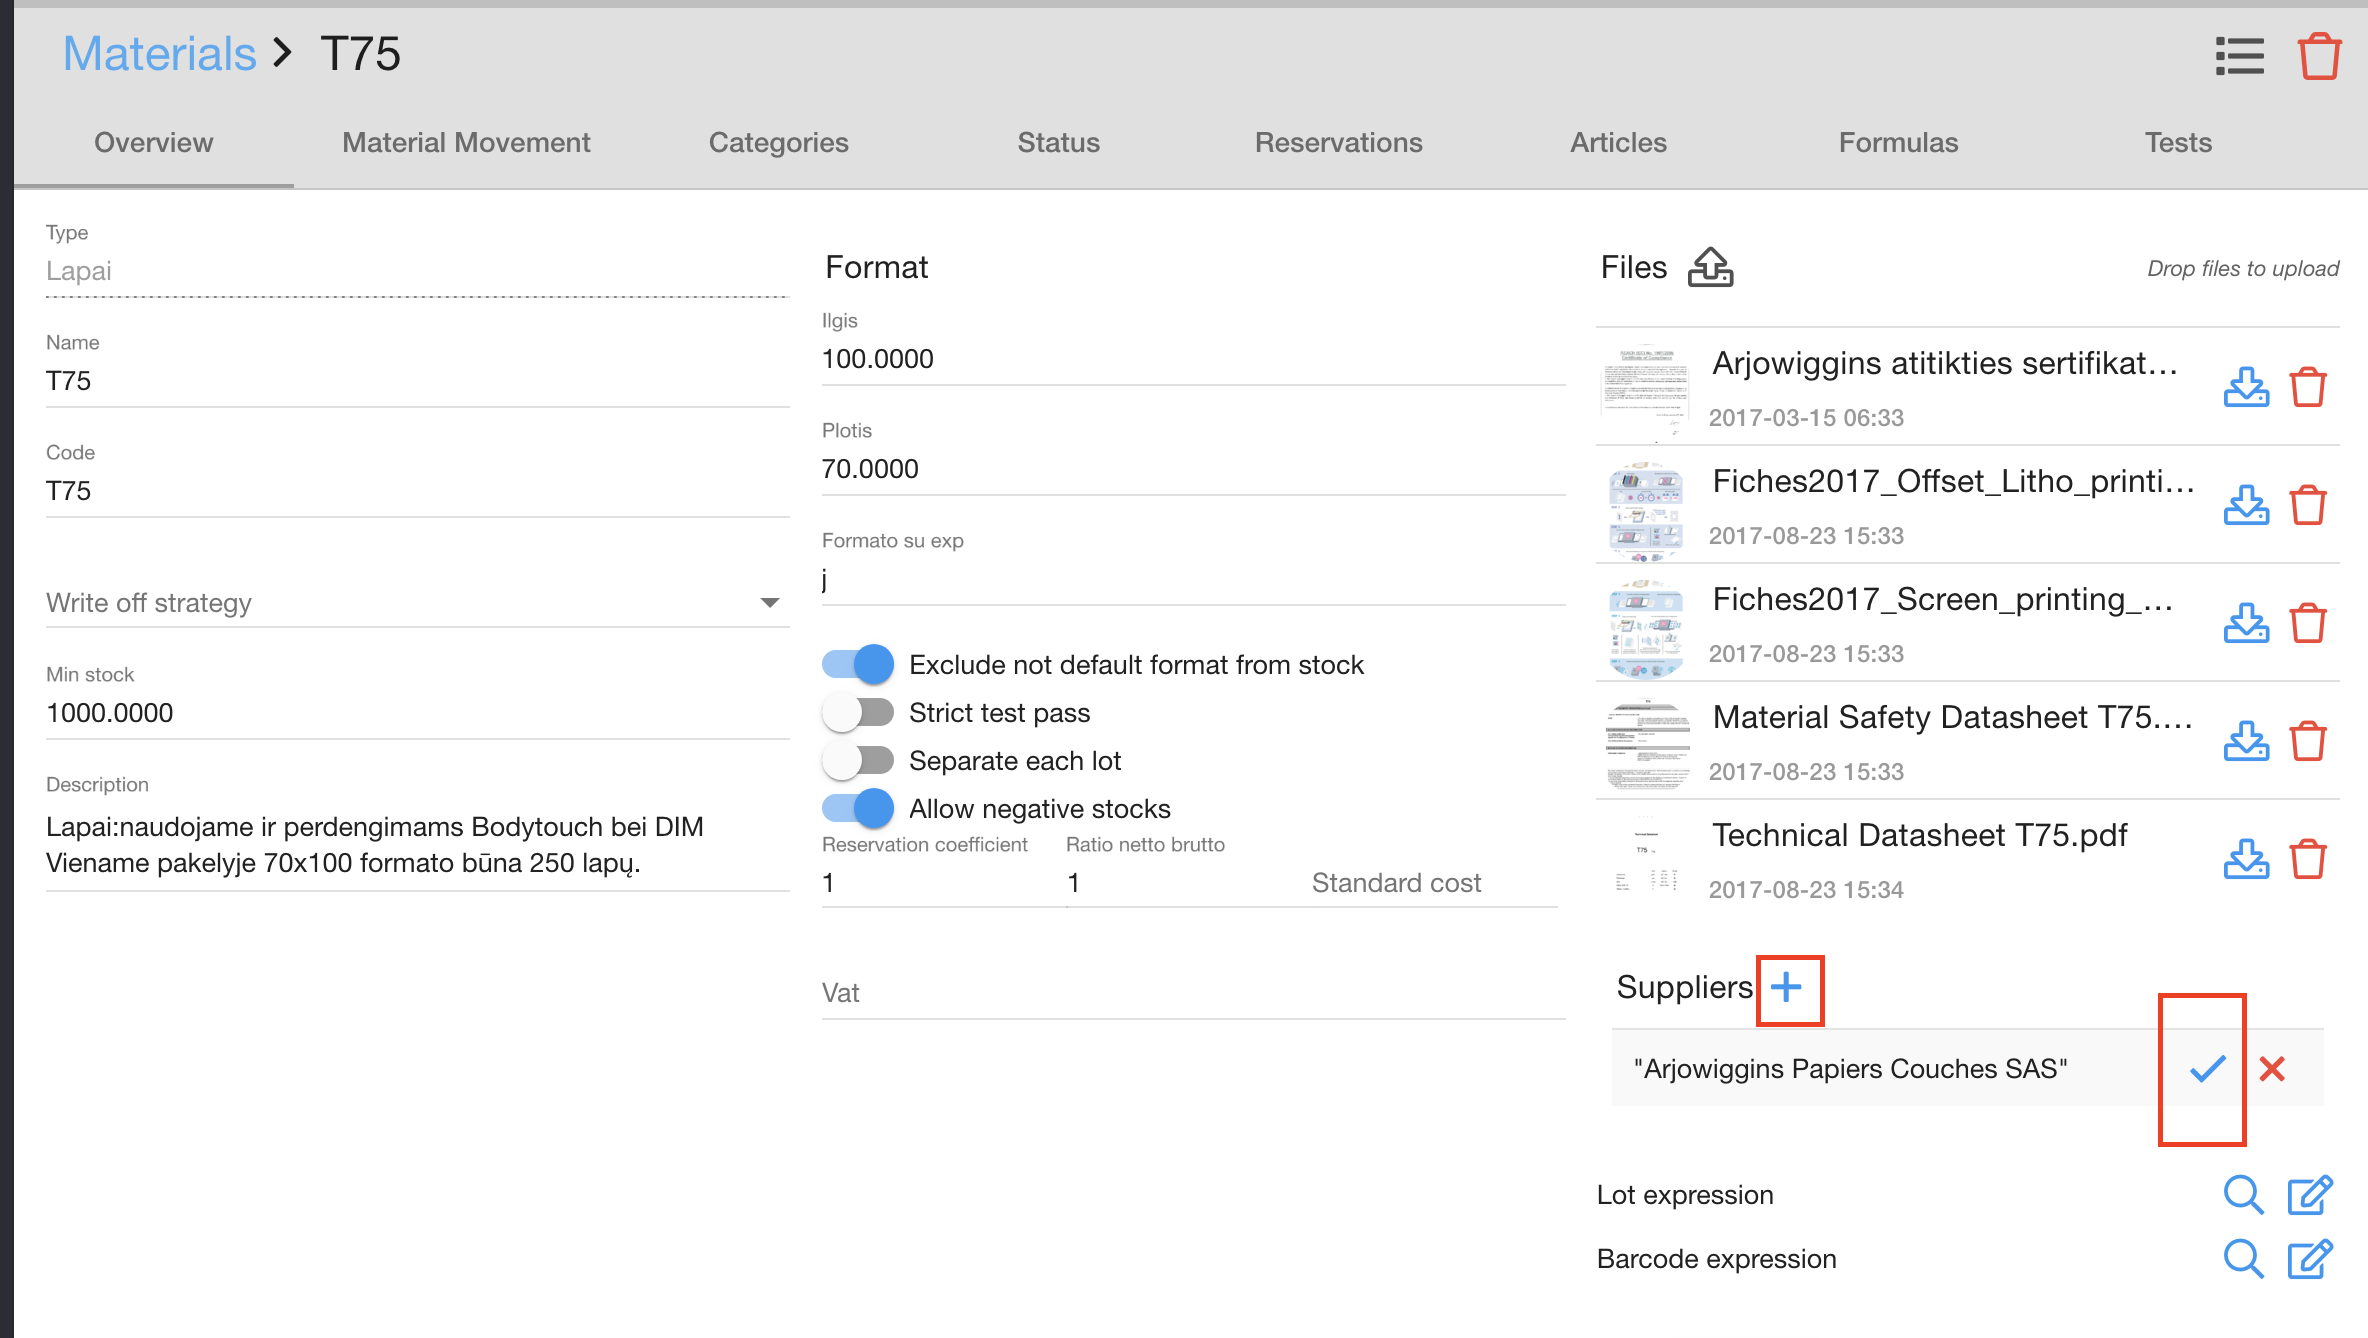
| Main supplier |
1. Add a supplier
2. Click on 
| How to see the material type photo in the materials table? |
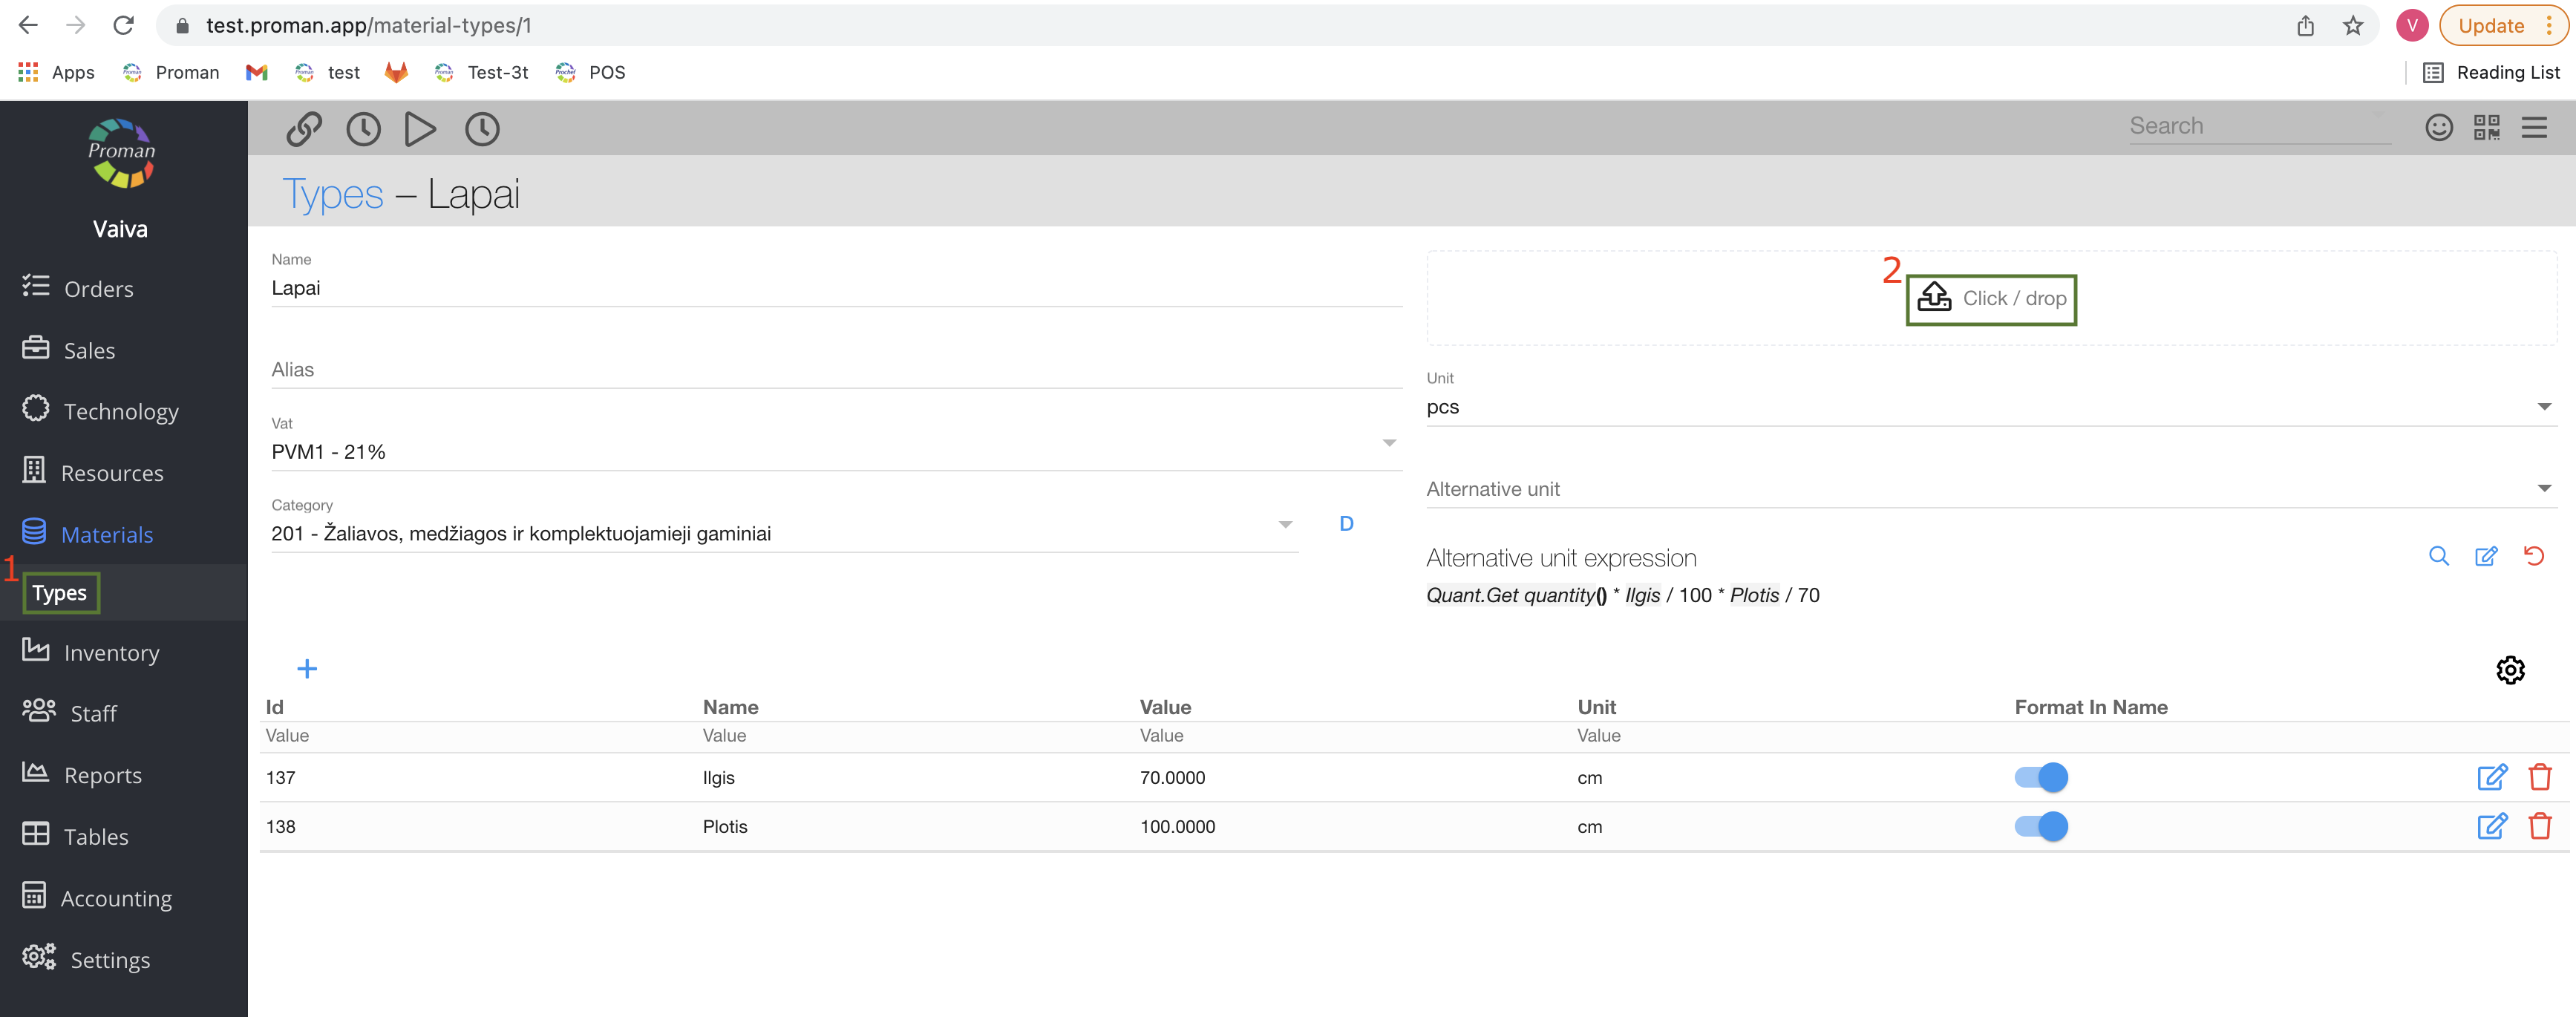
1. Click on

2. Upload a photo
Now you can see the photo:
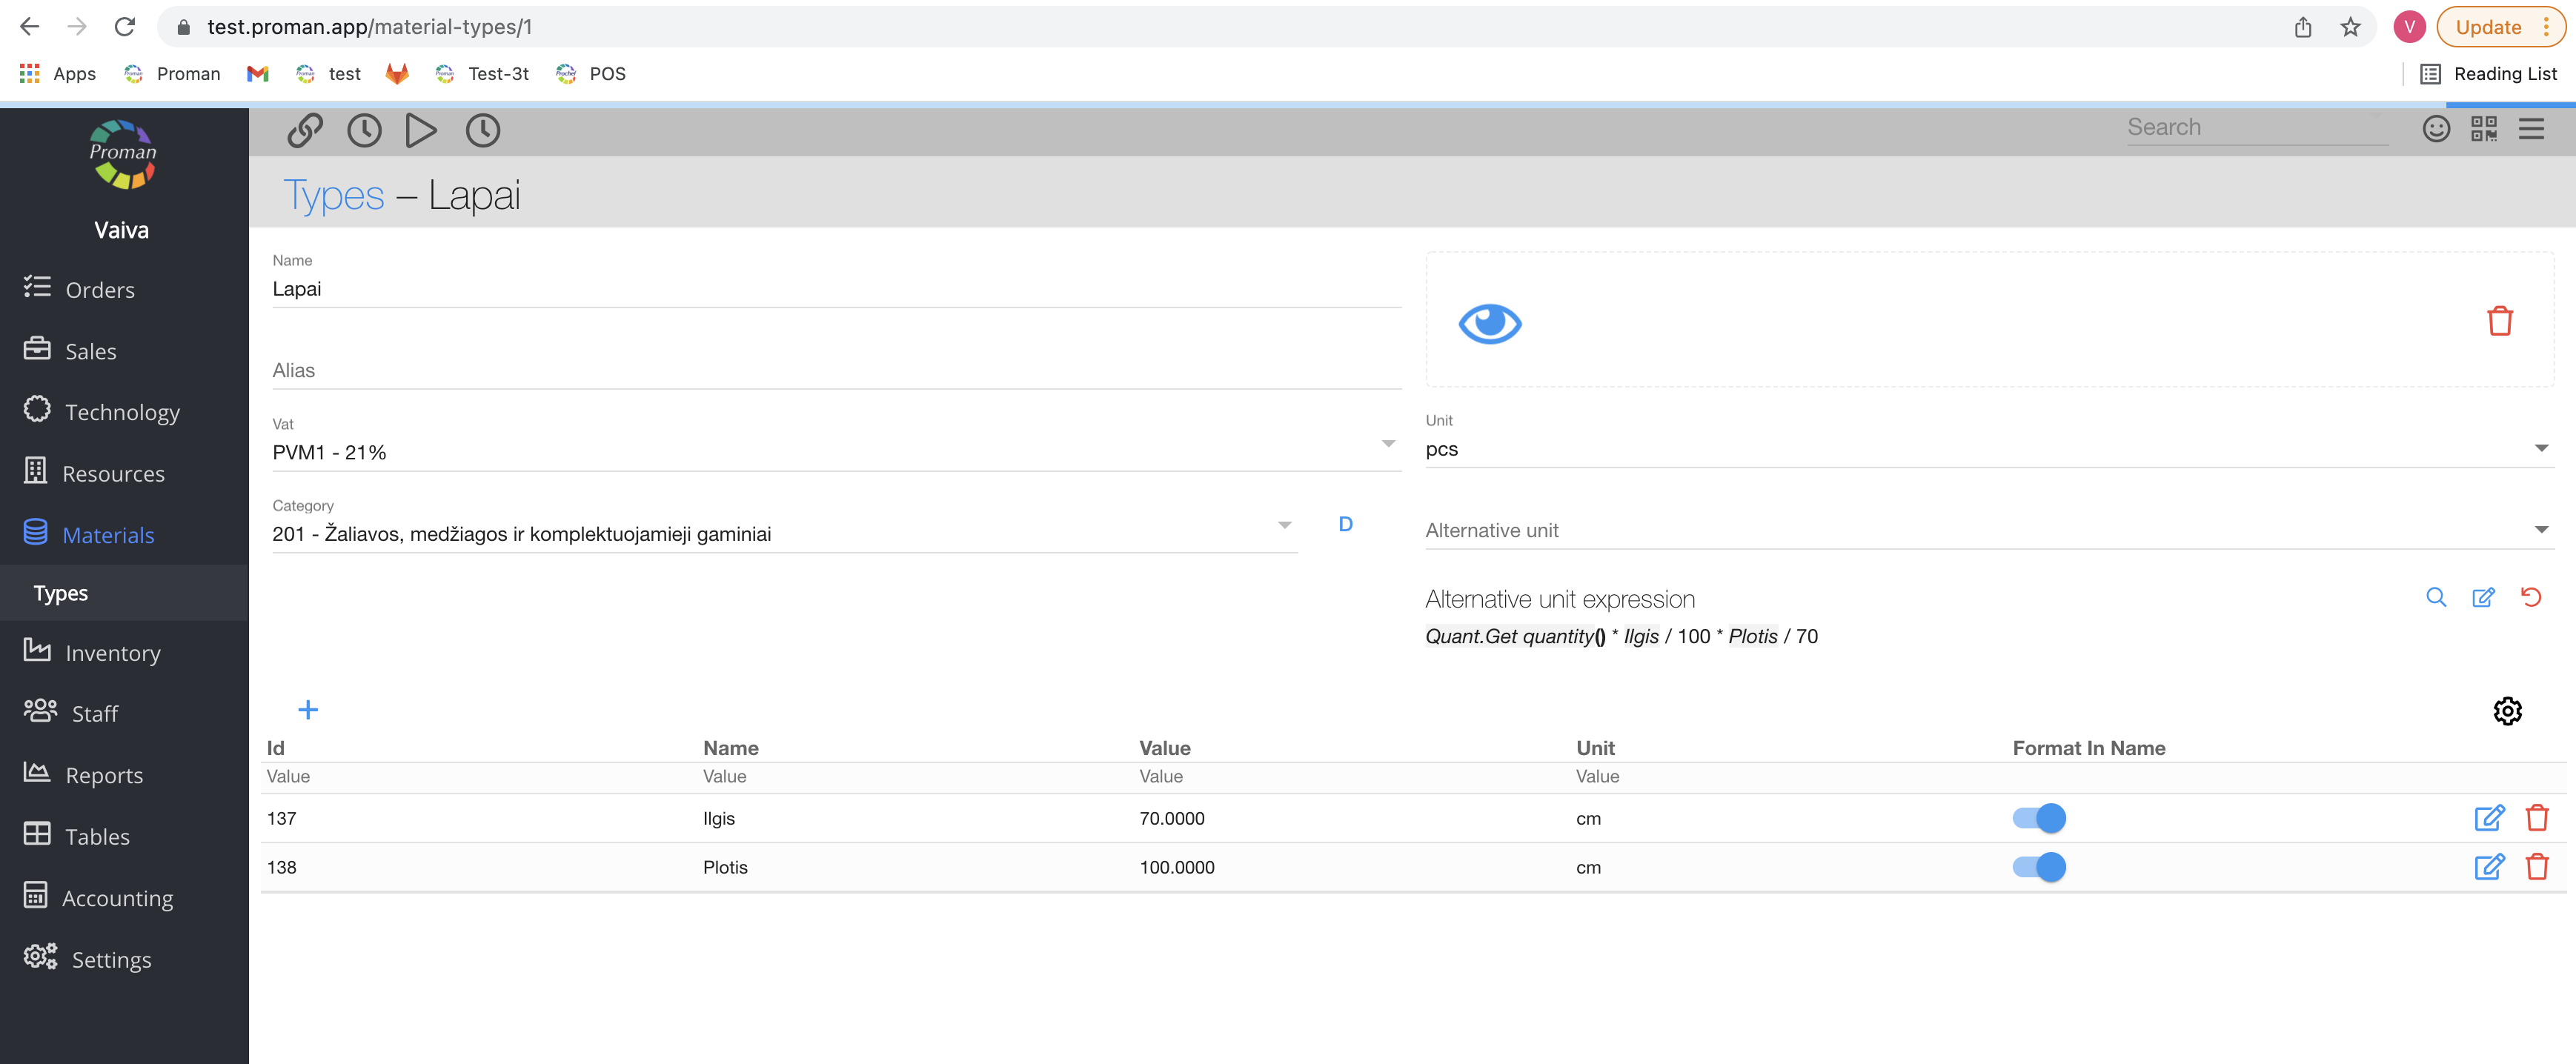
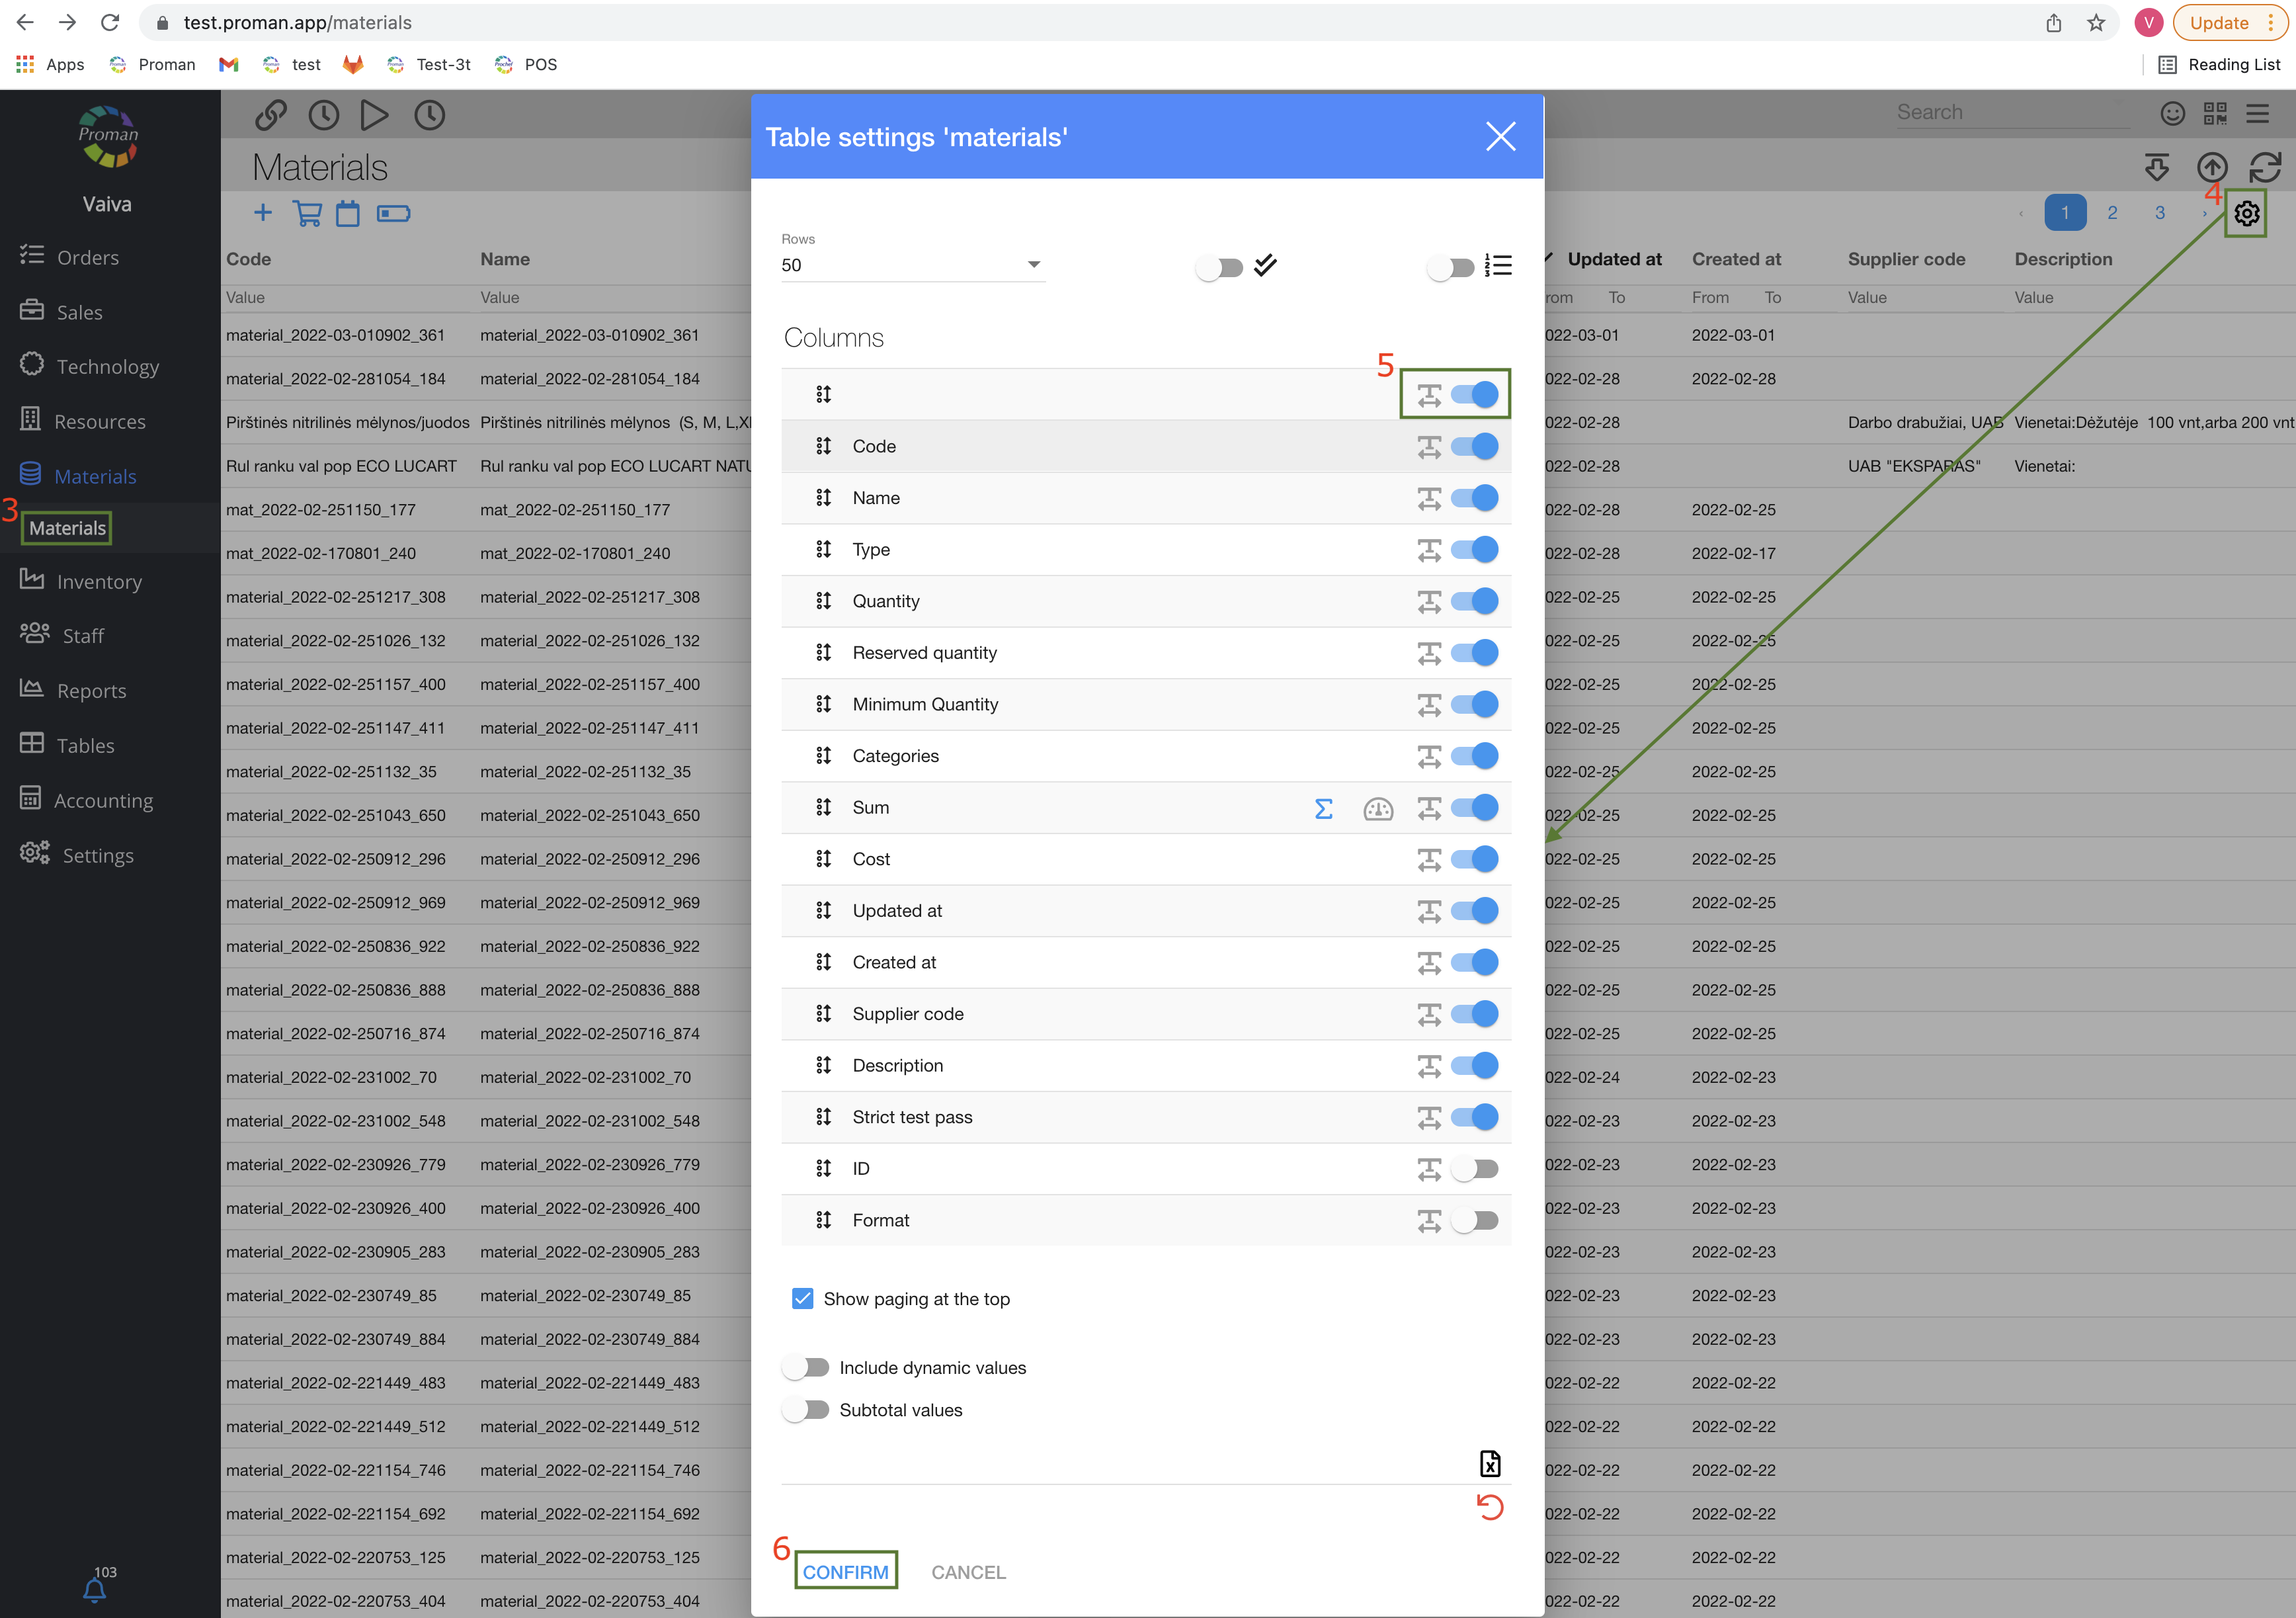
3. Click

4. Click on

5. In the dialog table search for an empty column and switch it on

6. Click on

Now you can see photos near the materials name:
| How to add an alternative material quant? |
1. Click on
2. Then-
3. Click on

Now you can see the field where you can choose the material

4. Choose a material
Now you can see the field where you can choose the remnant quantity
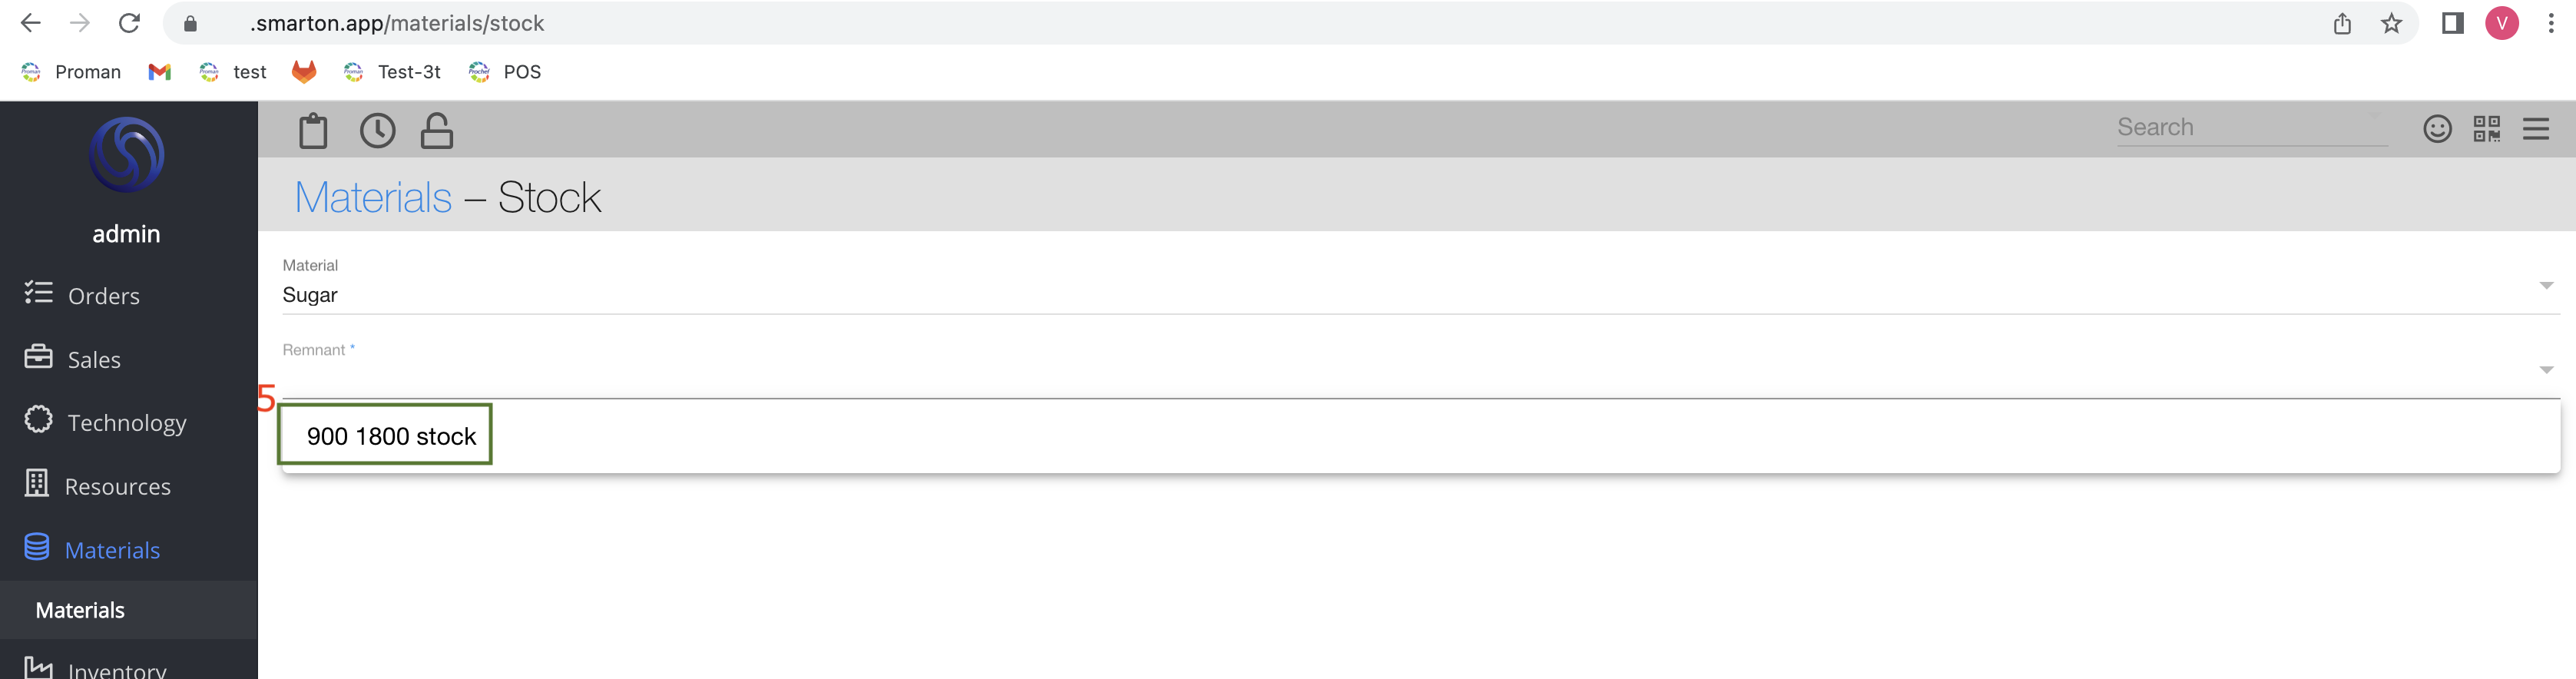
5. Choose a default remnant
Now you can see fields, where you can enter information:
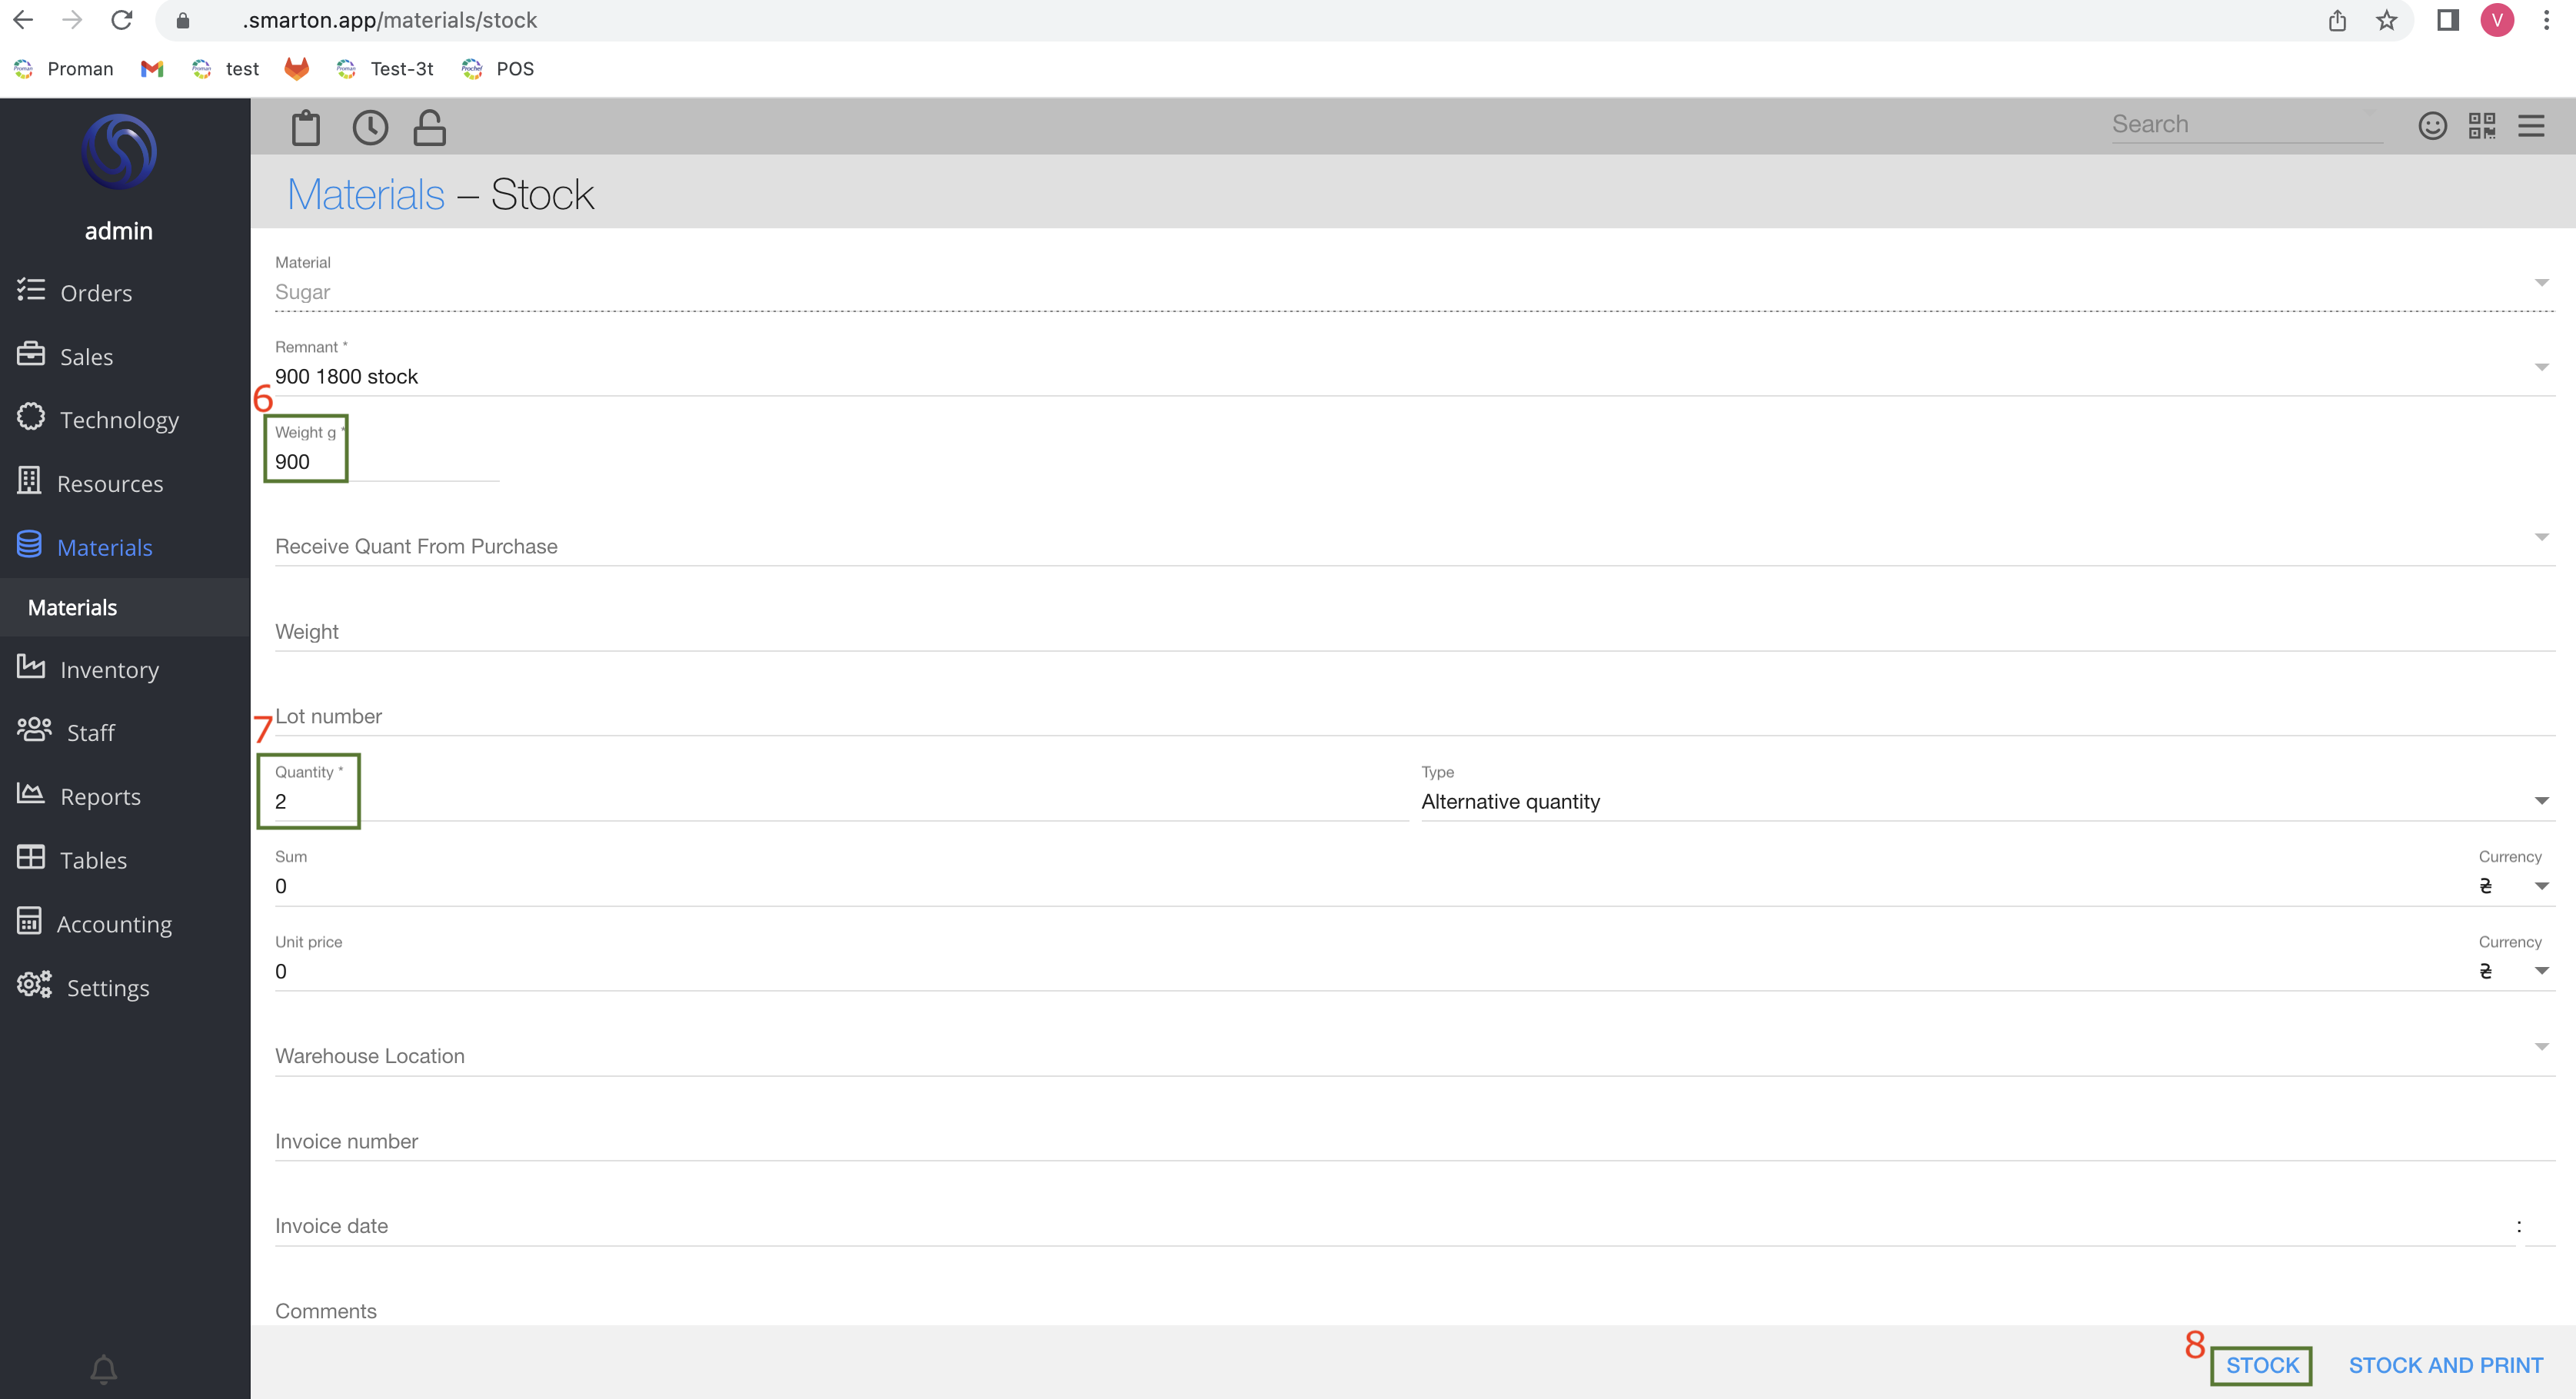
6. Enter how many grams are in 1 pcs
7. Enter quantity of pcs
8. Click on