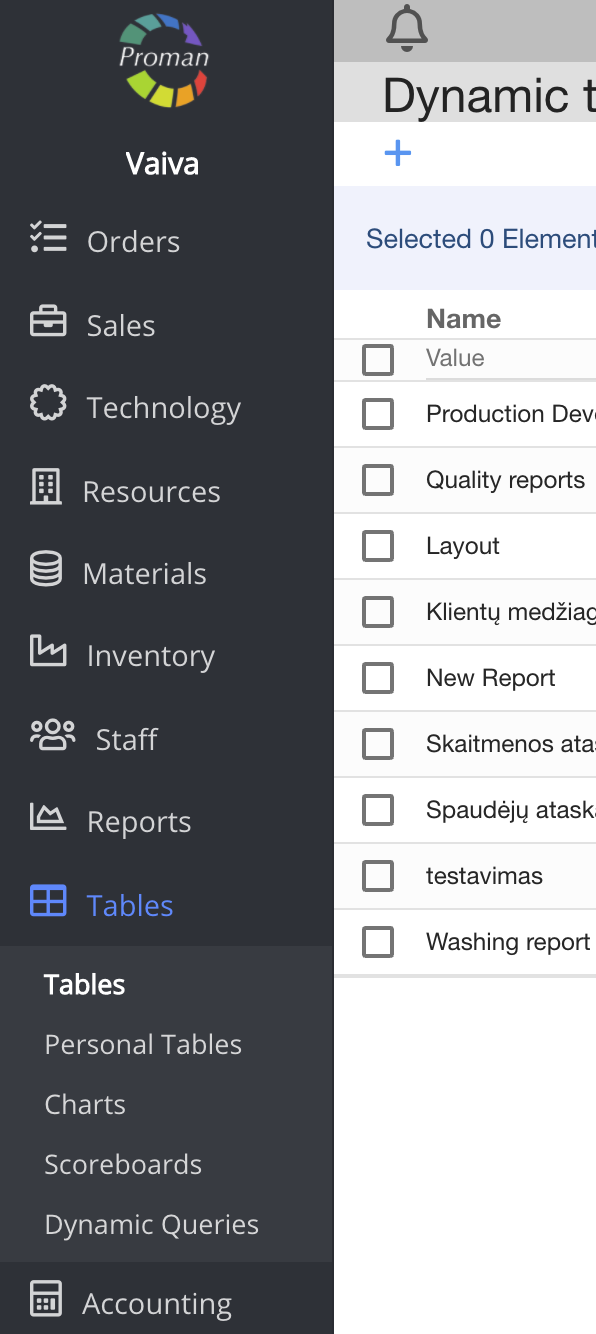
Dynamic Tables
Here you can see, create and fill in reports of Operations, Sales Opportunities. An employee should enter data into the Table that you have created. It will help you to see how a particular process is going and what can be improved.
| How to find the table tab? |
1. To find Tables, you should:
1.1. Click

1.2. and go to

Now you can see the Dynamic Table list

Here you can see, create (


| How to create a new Dynamic Table? |
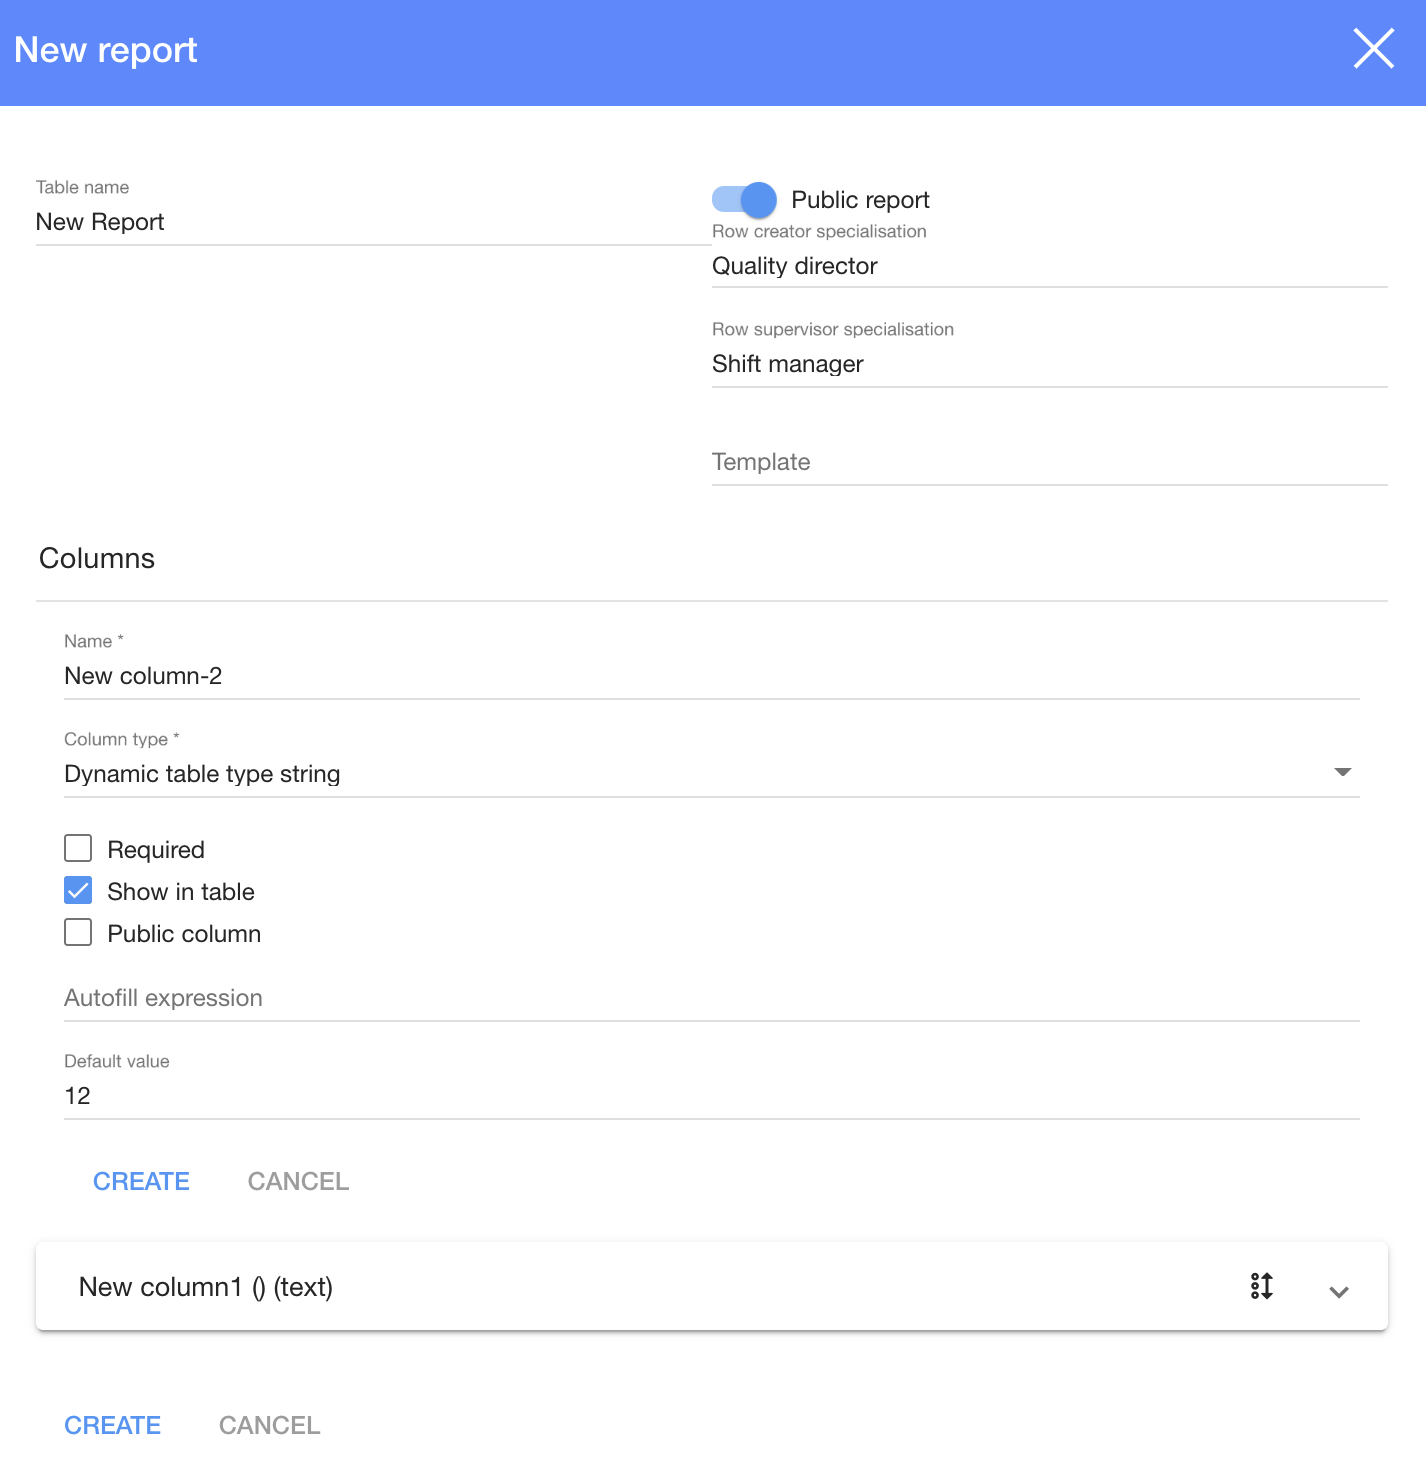
1. To create a new Dynamic Table, click on 
2. In the dialog table:
2.1. Enter a Table name;
2.2. Choose for it to be public (

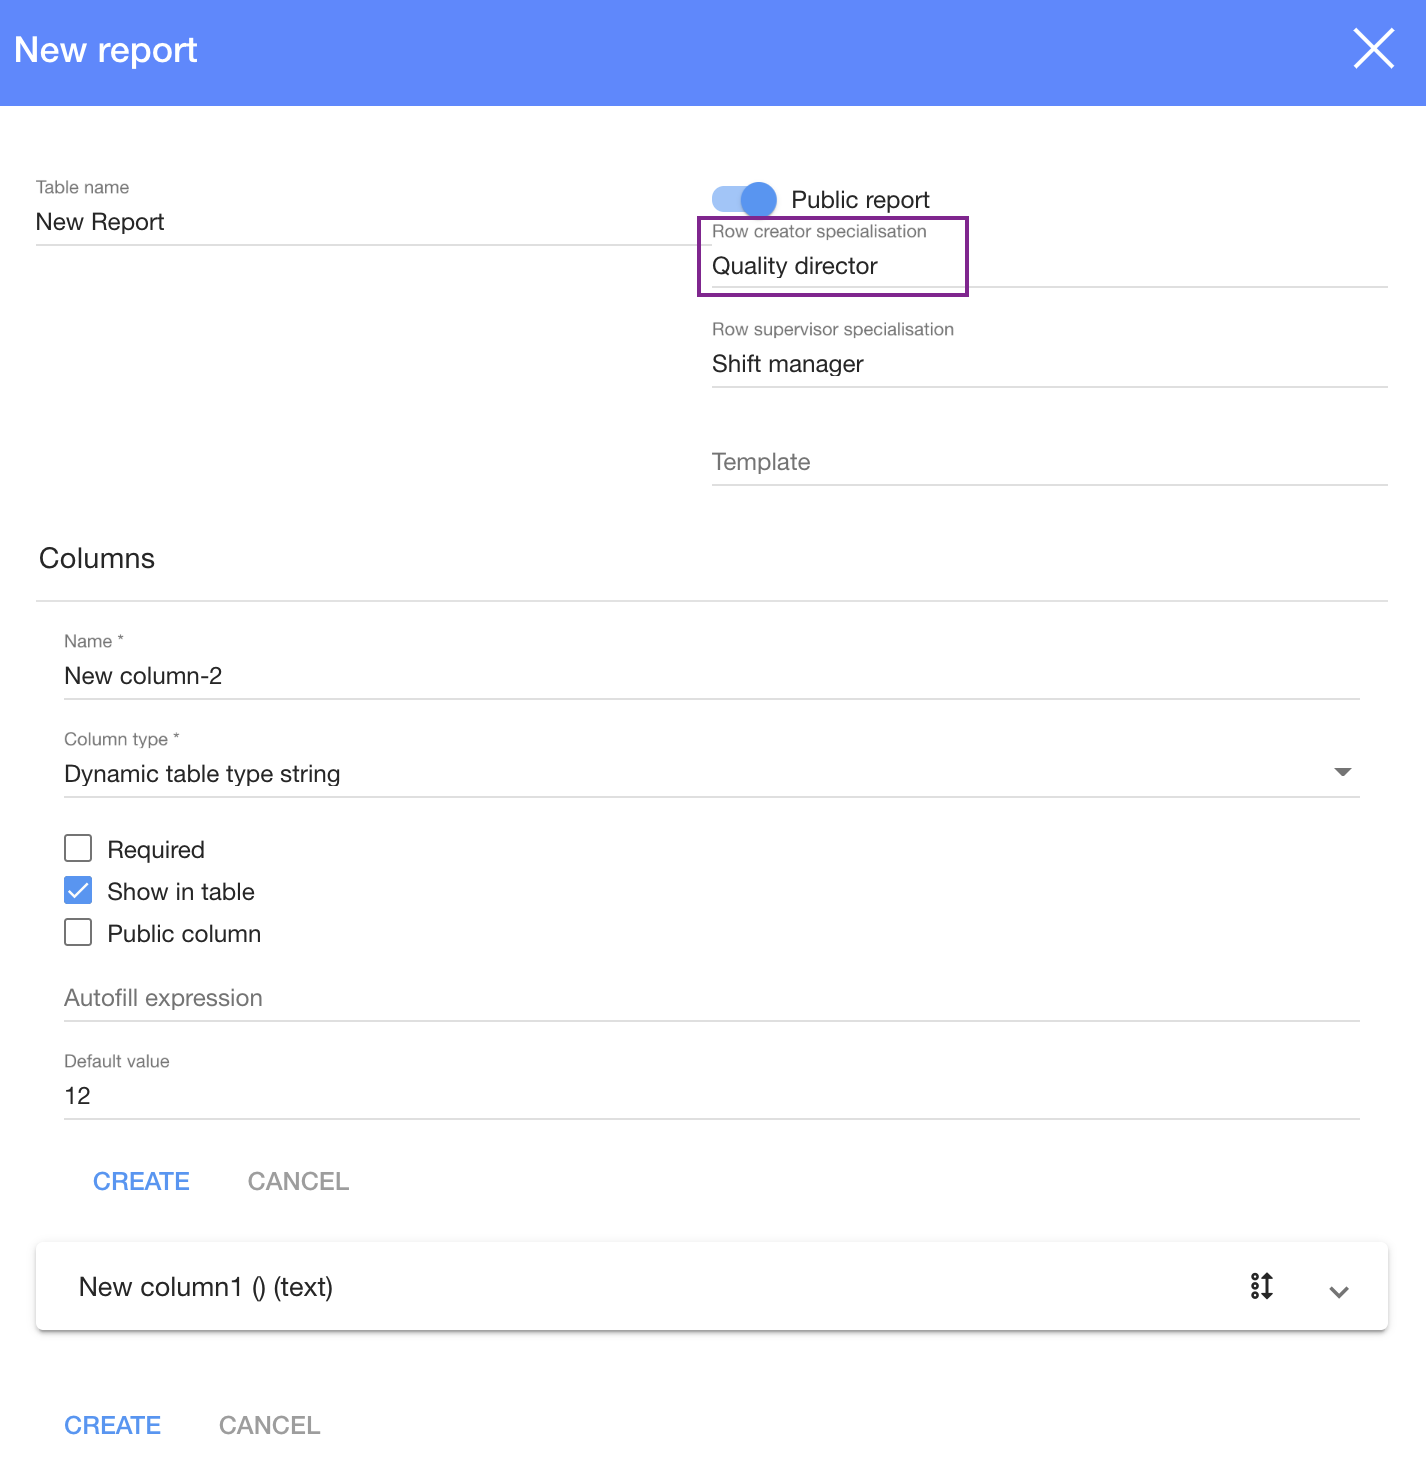
2.3. Select a row creator specialization from list;
2.4. Then choose a row supervisor specialization from list;
2.5. and choose a template;
2.6. To create a column, click

2.6.1. Enter a column name;
2.6.2. Choose a column type,
2.6.3. Check if it is Required, Show in table, Public Column (

2.6.4. Enter an autofill expression (if you need it)
2.6.5. Enter a default value (if you need it)
2.6.6. And click

2.7. You can change Column order (
3. Click
Now you can see the new table window

| Column types |
| Column type | |
Dynamic table type integer | You can choose to enter only numbers |
Dynamic table type string | You can choose to enter text(Max. 256 symbols) |
Dynamic table type text | You can choose to enter long texts |
Dynamic table type entity | |
Dynamic table type date | You can choose to enter dates |
Dynamic table type price | You can choose to enter prices |
Dynamic table type duration | You can choose to enter duration |
Dynamic table type dropdown | You can choose to enter a list (Max. 256 symbols each point) |
Dynamic table type boolean | You can choose to enter a 'Yes' or 'No" |
Dynamic table type entity field |
| How to enter data in a Dynamic Table? |
To enter any data, you first must have a permission. You can see who has the permission in the table "Row creator specialization)
If you have a permission to enter data, you should:
1. Choose a Dynamic Table
2. Click
3. In the dialog table:
3.1. Upload documents;
3.2. Enter values;
4. Click